Disclosure: This post may contain affiliate links.

This recipe is one I’ve been working on for a while and it is my ode to the rich, creamy deliciousness that is Blue Bell’s Homemade Vanilla Ice Cream.
❤️Here is why you’re going to love this recipe:❤️
- It uses only 6 wholesome, clean eating ingredients.
- It doesn’t require any eggs or cooking.
- It doesn’t require an ice cream maker, instead we’ll use our blender and a mini food processor.
- This is a simple (but oh-so-good) ice cream base that you can personalize by incorporating add-ins of your choosing.
- The process is quick and simple and you can make several batches that store away easily in your freezer.

How Can This Ice Cream Work Without an Ice Cream Maker?
In order to achieve a soft, creamy, and scoopable ice cream texture we’re going to apply 3 key theories that are all focused on the same goal – disrupting the formation of ice crystals.
- Fat: Fat plays a huge roll in ensuring our ice cream stays nice and soft and has a smooth and creamy texture in our mouth. A heavier fat content will disrupt the formation of ice crystals by creating microscopic bubbles of air between the water/liquid in the ice cream’s base. This also helps our ice cream’s melting point as well as amplifies our ice cream’s flavor.
- A Frozen Base: For this recipe we’re not churning our ice cream while it freezes, instead we will freeze our base into a solid mass and then break it up into chunks and process it.
- Aeration: This will be our version of churning. When we process our frozen ice cream base in our food processor we will create a thick, frozen base that will be aerated so that when we refreeze/leave it in the freezer to set, it maintains a scoopable and creamy texture.
So, without further ado, let me show you how insanely easy this recipe is to make!
Gather the Following Ingredients:

- Milk: Opt to use whole milk for this recipe.
- Coconut Milk: Ensure you’re using the full fat coconut milk because the fat content matters. This rich and silky milk goes a long way in helping our ice cream’s final texture while imparting a very mild flavor that you probably won’t even be able to tell is coconut.
- Sugar: I’m using raw cane sugar that’s been finely blended into a powder to help it dissolve quickly. You can also use a granulated sugar if preferred.
- Vanilla Bean Paste: This is where most of our flavor comes from so you don’t want to skimp on this. I love using a bean paste for this recipe because of it’s potent flavor and the gorgeous speckles from the vanilla bean. If you’re in a pinch and you’d like to use vanilla extract, I recommend doubling the amount (though note that it will darken your ice cream slightly)
- Mascarpone Cheese: This ingredient is our secret weapon. Mascarpone cheese is incredibly rich and silky smooth, and has the flavor of fresh cream (think unsweetened whipped cream). It is 45-55% fat compared to cream cheese which is 33% fat. If you don’t have it on hand or can’t find it at your grocery store, you can replace half the milk in the recipe with heavy cream, (just ensure it’s a clean eating heavy cream that is free of stabilizers or additives).
- Salt: A tiny touch of Himalayan salt or sea salt really enhances and boosts both the sweetness, the richness and the amazing vanilla flavor of our ice cream. I recommend using just a tiny pinch though, as a little goes a long way.
Making Your Base Is as Easy As…

Place all your ingredients into a blender cup and blend it all together or you can use a deep bowl and an immersion/stick blender to combine everything. I recommend this method because it gives you a base that is fully combined into a smooth and homogenous mixture. The powerful blending emulsifies and combines our fats with our liquids and dissolves our sugar and evenly disperses our flavor in a way that is unmatched.

With your base blended, pour it into a zip bag (or even into a silicone mold if you have one large enough), ensure it is fully sealed and that there are no leaks and set it flat in your freezer to freeze completely. Note: Ensure it’s laid flat to make the next step easier.

Once frozen, remove your ice cream base from the bag and break it up into chunks using your hand or gently prying chunks off using a knife.
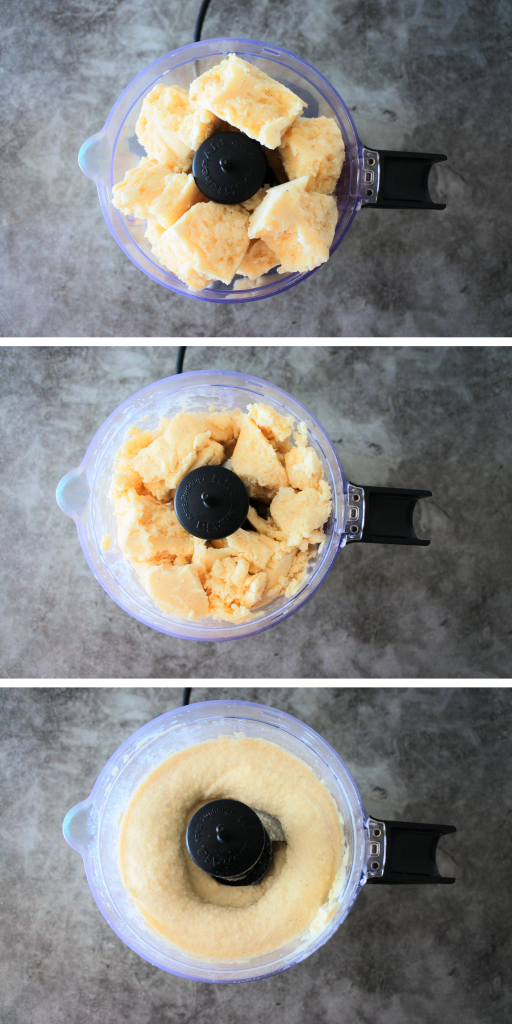
Place your chunks into a mini food processor and being to process it until it is smooth. Note that it’s not necessary to add any liquid. You can pulse until the pieces are small enough to start moving around on their own and within a couple of minutes it will break down into a smooth and creamy soft serve texture.
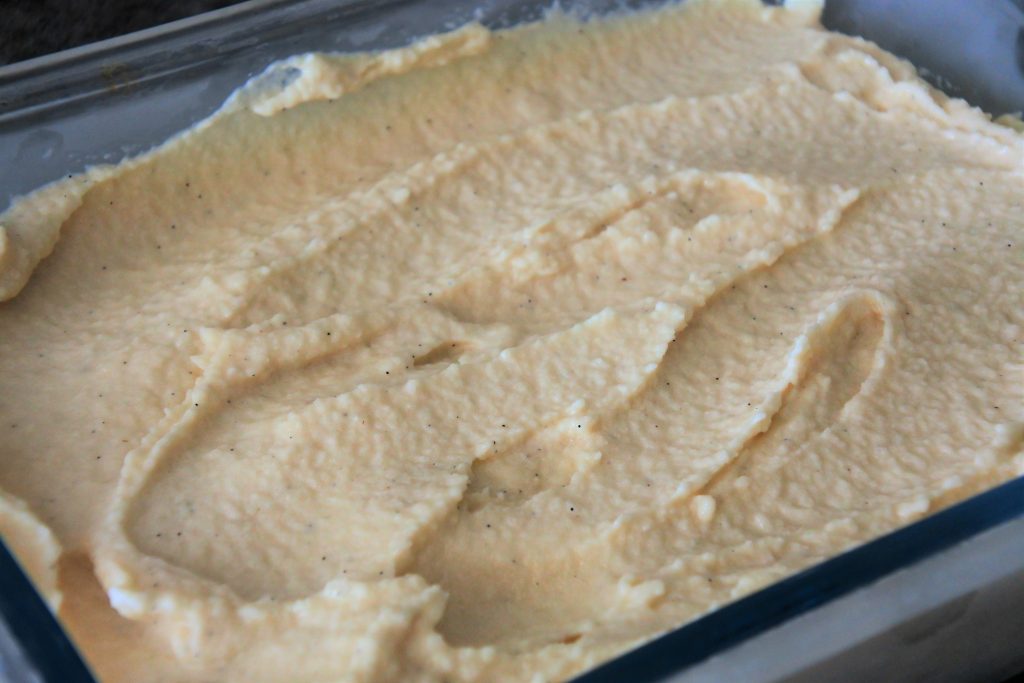
Once processed you can enjoy it right away as a soft serve or you can place it into a freezer-safe container. (Protip! Prechill your container to minimize any melting which will encourage ice crystals to form once you refreeze it/put it to set completely.)
If you want to fold in any add-ins feel free to do so now, maybe some cookie or brownie chunks or bits of crushed up homemade Reese’s peanut butter cups, or just some simple mini dark chocolate chips, or maybe even some wild blueberries!
A Must-Do Tip:
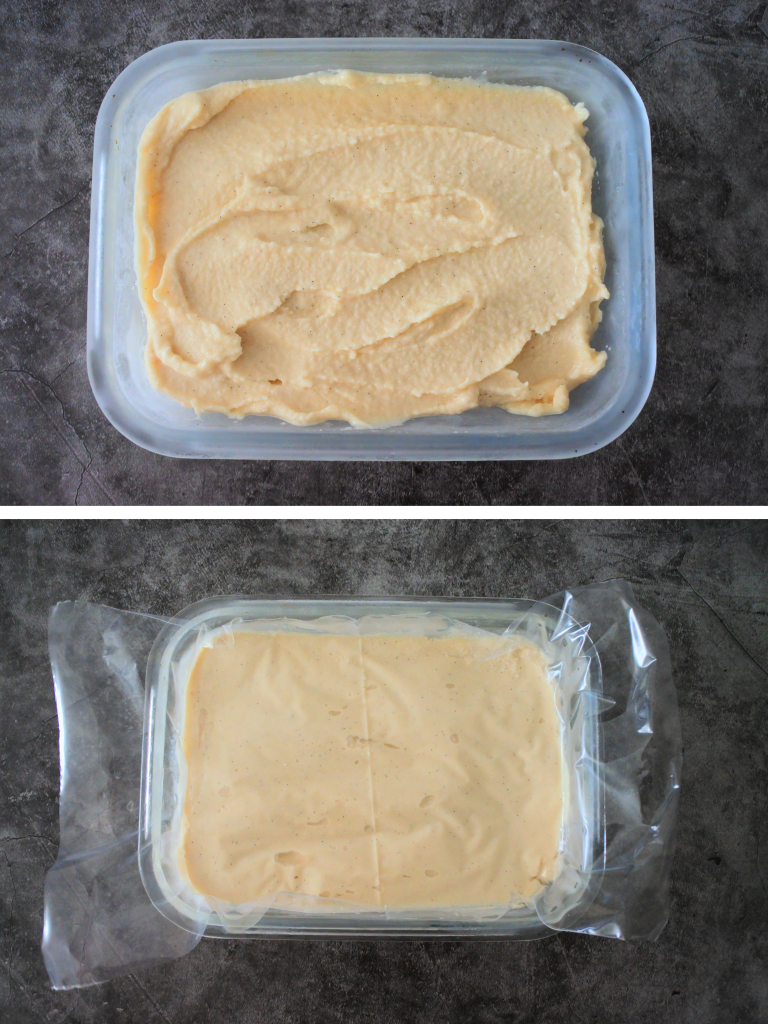
Press a piece of freezer-safe plastic over the surface of the ice cream to create a “skin” that will allow it to not be exposed to air which will in turn reduce the likelihood of the formation if ice crystals. After serving a portion, I press the plastic back over the surface and cover the container and store it in the freezer. Trust me, it works!
Here’s a Great Tip to Get Perfectly Scooped Ice Cream:

You can do one of two things though they amount to the same thing – letting your ice cream thaw a bit once you take it out the freezer. To do this you can either:
- Remove the container from the freezer and allow it to sit at room temperature for a few minutes before scooping so that it can thaw slightly.
- If you have a microwave with the setting to soften/melt ice cream, set it for 16 oz and let it go for about 15-20 seconds before checking on it. Do not let it go the full cycle!
By the way, if you’re curious about the cone that the ice cream is in, rest assured it’s not a pancake like my friend Eric thought 😅 It’s actually a fantastic homemade gluten-free waffle cone recipe from Nicole over at Gluten-Free On a Shoestring that you really need to try out. It’s so easy to make but a bit tricky to wrap into a cone shape but you can also press then into a parchment lined bowl to make an easy waffle bowl!
What Does Ice Cream Pair Great With?
Cake!
I made a gluten-free chocolate cake for Mr. Kitrusy’s birthday using a layer of this fantastic vanilla ice cream in the middle and frosting it with a simple chocolate frosting and then topping it off with shaved flakes of dark chocolate. Honestly a part of me wanted to have a layer of my Chocolate Ice Cream for a wholly decadent death-by-chocolate situation, but I love the contrasting look of the thick layer of white ice cream in the middle sandwiched by the cake. Take a peek below! 👇

Looking for Other Frozen Treat Indulgences? Try One of These Recipes!
- Chocolate Ice Cream (Easy, No Churn!)
- One Ingredient Peach Sorbet
- 6-Ingredient Neapolitan Milkshake
- Soft and Fruity Pineapple Popsicles
- Easy Banana “Nice” Cream
- Refreshing Summery Limeade
- Iced Coffee Frappe
That’s it for another recipe! I hope you give this one a try and if you have and questions feel free to drop a line in the comments below! Did you try this recipe? What did you think? Don’t forget to rate it and leave a comment letting us know how it came out! See you guys in the next post! 😊

Vanilla Ice Cream (Easy, No Churn, No Eggs)
Equipment
- Blender
Ingredients
- 1½ cups Whole Milk
- ¼ cup coconut milk or cream
- ¼ cup mascarpone cheese
- ¼ cup raw cane sugar (finely blended)
- ½ tbsp vanilla bean paste
- pinch Himalayan salt or sea salt
Instructions
- Make your Base: Place all ingredients into a bullet blender and pulse until smooth and fully combined. Alternatively you can place your ingredients into a deep bowl and use a stick/immersion blender to combine.
- Freeze: Pour the base into a zip bag, seal it and place it flat. Freeze the base until solid.
- Process/Blend: Once frozen, break the base into chunks and place them into a mini food processor and process until smooth. (If including any add-ins, fold them in now) Enjoy right away as a soft serve or place into a 16oz container and freeze until set to desired consistency (see notes for how to scoop your ice cream easily once frozen).
- To store: keep frozen in an airtight container with a piece of plastic wrap pressed over the surface to discourage the formation of any ice crystals which will make your ice cream hard and icy.
