Disclosure: This post may contain affiliate links.
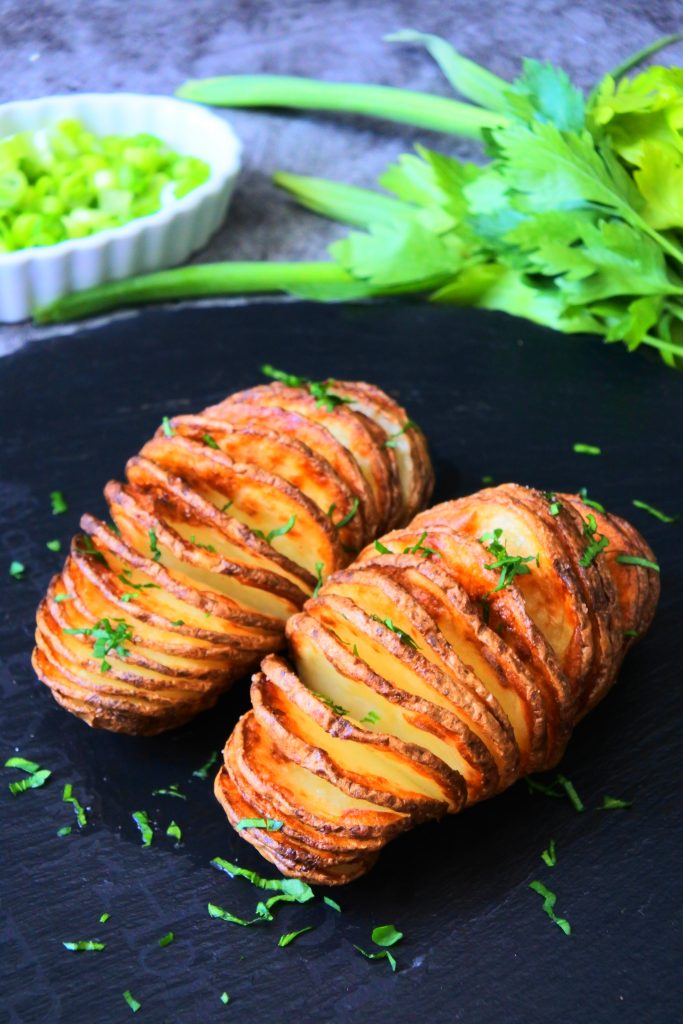
Deceptively easy to make, trust us when we say that nothing looks fancier than a fanned out, scalloped Hasselback potato topped or stuffed however you liked and sitting nestled on your plate next to your protein and vegetable of choice.
Where Did the Name Hasselback Come From?
Known as Hasselbackspotatis in Sweden, the Hasselback potato originated sometime between 1940-1950 at the Hasselbacken restaurant in Stockholm, Sweden. This simple method for roasting potatoes involve slicing slits into the potato without cutting through it before roasting them which results in a crispy outside and soft and fluffy interior. The end result is a fancy and upgraded version of a baked potato.
💕Here’s Why You’ll LOVE this Recipe
- This dish is clean-eating, gluten-free, paleo-friendly, vegetarian friendly and can be modified to be vegan and dairy-free too!
- It requires just three basic wholesome ingredients.
- It comes together in about 30-minutes (half the time of the traditional method) thanks to a few clever shortcuts.
- Potatoes are a healthy, low-calorie starchy root vegetable to is full of nutrients and antioxidants.
- It is an affordable and simple meal option that can be enjoyed by itself or with other things. Speaking of which…
- This recipe is perfect on it’s own but it’s also open to being topped with any of your favorite flavors and toppings making it wonderfully customizable.
Here’s the Ingredients Needed for this Recipe

- Potato: You can use any potato of your choosing from Russets to Yukon Golds to even sweet potatoes. You can even use new/baby potatoes (also known as two-bite potatoes) to make tiny appetizer-sized Hasselback potatoes!
- Oil and/or Melted Butter: This will be used to baste our potatoes as they cook giving them both flavor as well as color and as crispy texture. If you’d like to keep this recipe dairy-free, opt to use ghee instead.
- Salt: I’m using a Himalayan Pink salt but you can use any salt of your choosing and any grind of your choosing from fine to flaky.
Here’s How to Make This Dish
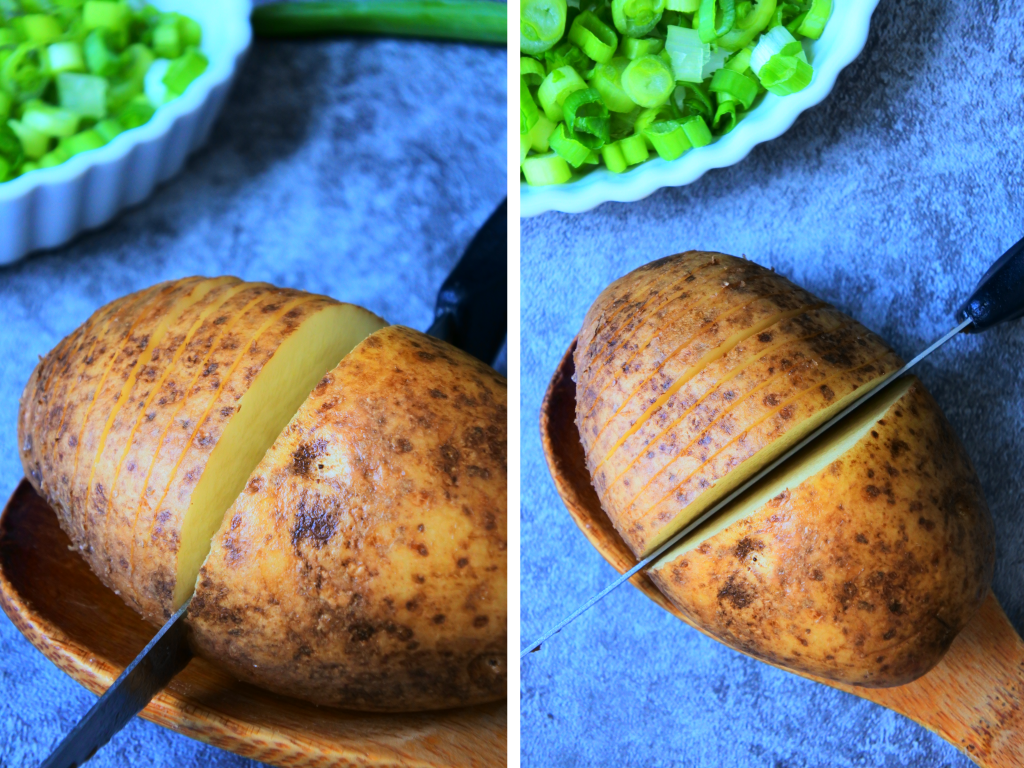
We’ll begin by washing and scrubbing our potatoes clean. Then we’ll slice them Hasselback style. A great trick for this is to either place your potato onto a large wooden or metal spoon or placing it between two chopsticks, the potato will sit in the curved bowl of the spoon and the edges will act like a stopping point for the knife to keep you from cutting through it. You’ll want your slices to be anywhere from 1/8″ to 1/4″ thick, just try to be consistent.
Do I Need to Leave the Skins On?
You don’t have to but I like to because it’s not only less work but also adds more fiber and nutrients to your dish! If you prefer the skins off though, you can peel your potatoes before slicing them.
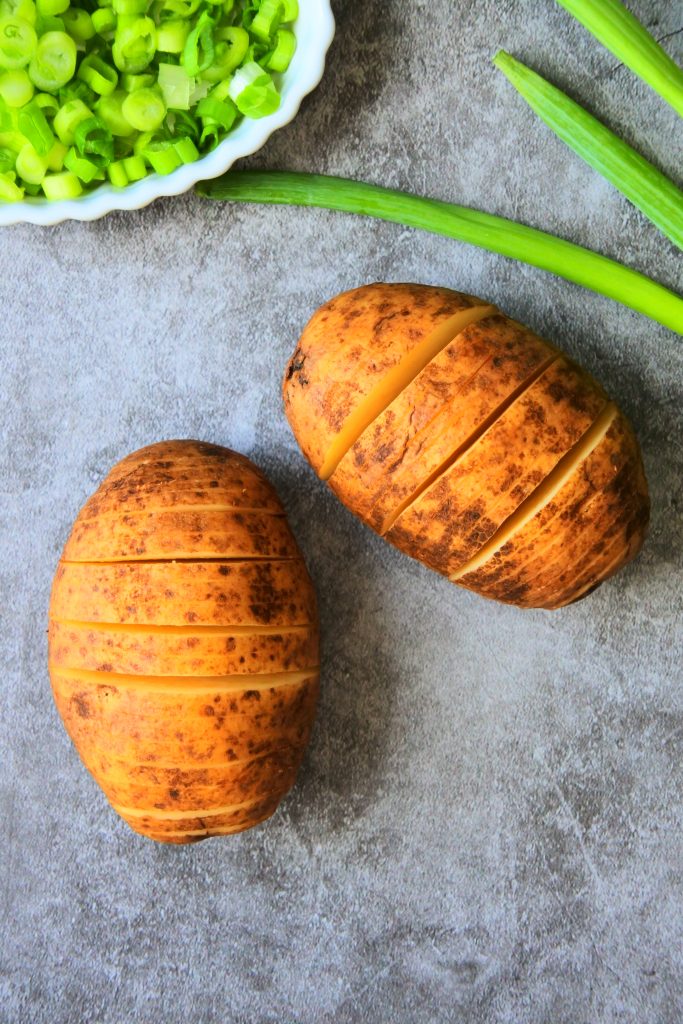
With our potatoes cut we’ll now rinse them thoroughly. And you might be wondering…
Why Rinse the Potatoes?
When you cut into the potatoes they naturally release sugary starches (aka potato starch) that, if not removed, will prevent your potatoes from crisping up when they cook. By rinsing the starch off it also introduces water into your potatoes, it serves the dual purpose of allowing your potato to steam from the inside as it cooks which allows you to have a tender inside and crispy outside! If you’re in a rush you can simply rinse the starch off, or if you have a bit more time, let your potatoes sit in a full bowl of cold water for about 30 minutes to as long as 60 minutes.
Microwave
Next, we’ll lightly brush them with oil and microwave our potatoes on high under a cover or bowl for a 2-3 minutes to partially cook them through. Using the oil is important in this step as it will keep our potatoes from drying out or losing too much moisture. The potatoes don’t have to be cooked all the way through, just partially cooked, once we air fry them they will finish cooking to give us a potato that is soft and tender on the inside and crispy on the exterior!
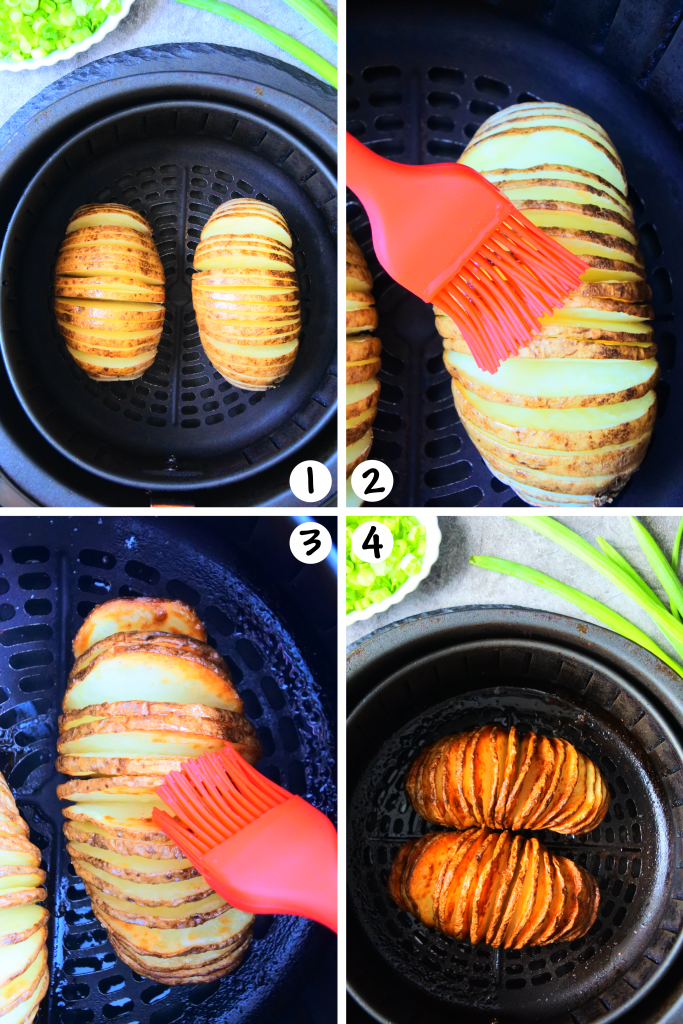
Air-Fry
Now it’s time to airfry them. (1) Place your prepped potatoes into the basket of your 400F preheated airfryer and generously baste them with butter or ghee, being sure that the butter gets drizzled in between the slices as well. (2) Airfry them for 5-6 minutes, then pull out the basket and butter baste them once more. (3,4) Repeat this process 2-3 more times or until your potatoes have reached your desired level of doneness and are cooked through with a crispy exterior.
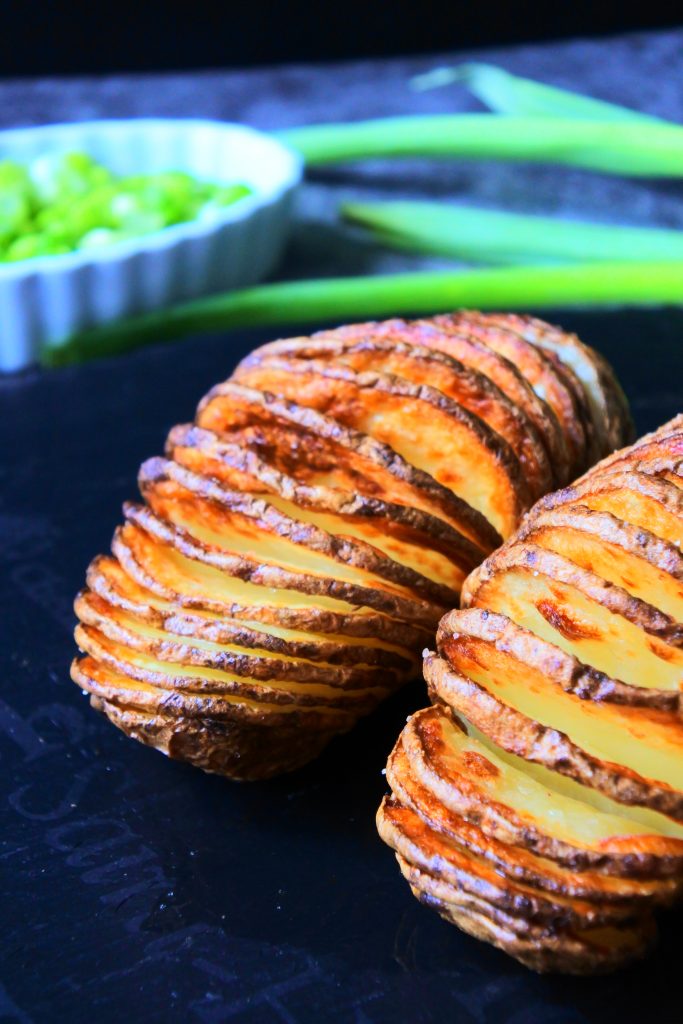
Remove them from the airfryer and brush with butter one final time and then allow them to cool for a few minutes before topping them and or enjoying. Speaking of which…
Toppings!
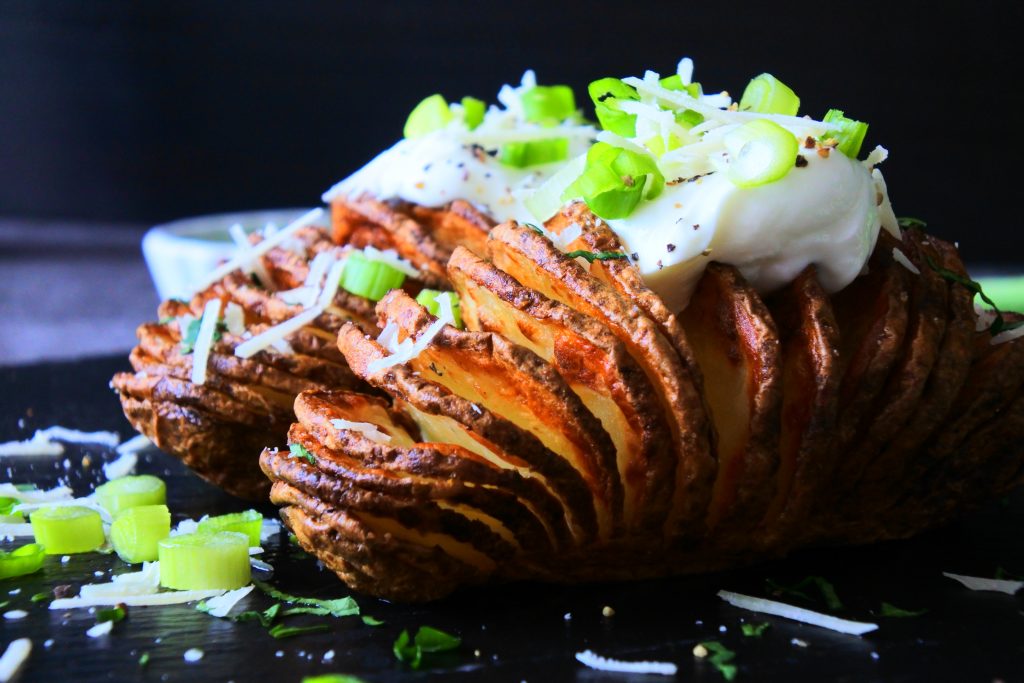
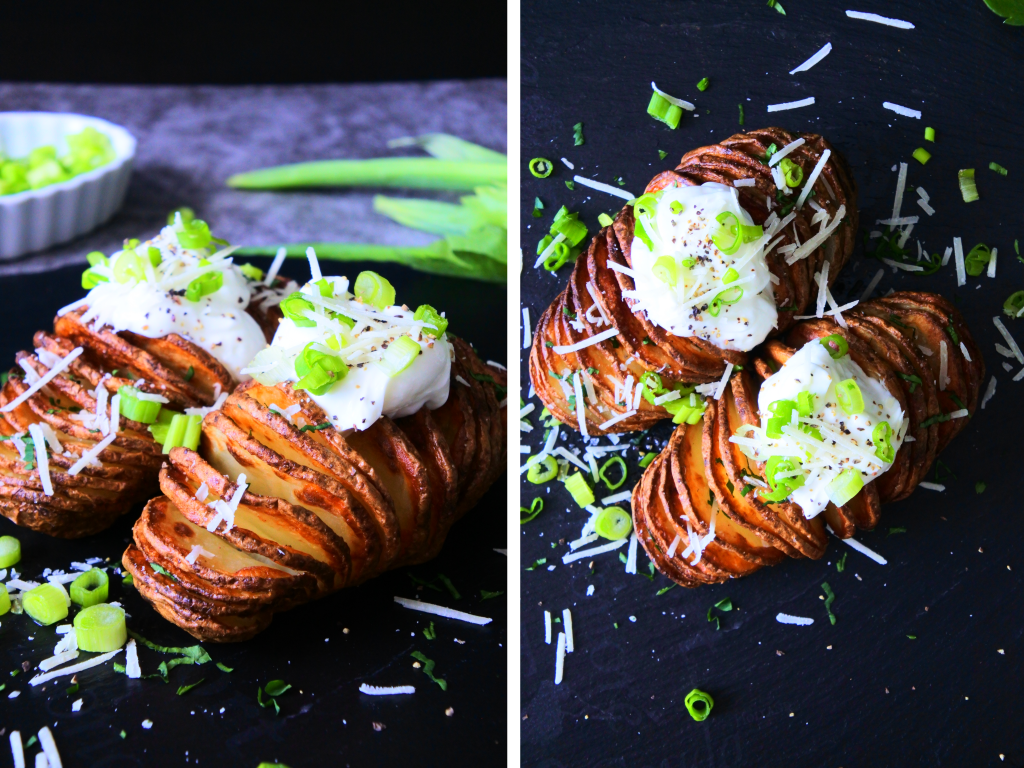
You can enjoy your potatoes just as is, or top with a bit more salt. Other options include:
- A fresh crack of black pepper.
- Sour Cream/Plain Greek Yogurt.
- Finely chopped chives or spring onions.
- Shredded hard cheeses such as parmesan or asiago or any cheese of your choosing.
- Crispy bacon bits.
- A final brush of garlic butter or an Herb Butter.
- A sprinkle of your favorite fresh (or dried) herbs over the top such as rosemary, thyme, parsley, etc.
- Any seasoning blend you enjoy.
Or if you’d like to make your potatoes stuffed with gooey cheese, you can place slices of whatever cheese you like between the layers and allow them to melt with the residual heat of the potatoes or pop them back into the airfryer for no more than a minute or two to get the cheese melted!

Incredibly Easy Air-Fried Hasselback Potatoes
Ingredients
- 4 med Russet Potatoes
- 1 tsp Himalayan salt
- 3 tbsp extra light olive oil and/or melted butter or ghee
Instructions
- Wash and scrub your potatoes clean and pat dry. (If preferred you can peel your potatoes)4 med Russet Potatoes
- Preheat airfryer to 400°F
- Place your potatoes onto a wooden spoon, or between a pair of wooden chopsticks and using a sharp knife, cut slits into your potatoes about 2-3mm apart. (The spoon/sticks will act as a guard to keep you from cutting through the potato)
- Rinse your potatoes under cold water and pat dry, or, if you have time, submerge them in a bowl of cold water and allow them to soak for 30-60 min.
- Place your potatoes on a microwave-safe plate and brush them with a layer of oil before covering them with a microwave safe cover or bowl. Cook them in the microwave on high for 2-3 minutes until semi-cooked through.3 tbsp extra light olive oil
- Place your potatoes into the preheated airfryer basket and brush with more oil or you can swap over to using melted butter/ghee for more flavor and sprinkle salt on top.3 tbsp extra light olive oil, 1 tsp Himalayan salt
- Air fry for 5-6 minutes, then check on them, brush with more oil/butter and set back to airfry for another 5-6 minutes. Repeat this step 2-3 more times or until your potatoes are as browned/crispy as you'd like.
- Remove them and brush with butter one final time and then let them cool for a minute before topping them however you'd like. Serve immediately .
To Finish
- Make the Cheese Stuffed: If you'd like to make them cheese loaded, place a slice of cheese (sharp cheddar is highly recommended) between each cut and allow the residual heat of the potato melt the cheese or you can pop it back into the airfryer for 1-2 additional minutes.
- Toppings: Top with salt, pepper, sour cream/Greek yogurt, chives, bacon, shredded cheese, garlic butter, or any other topping you enjoy.
Notes
- Brushing your potatoes with oil before microwaving them is a necessary step to keep the potatoes from drying out too much as the oil seals the moisture in.
