Disclosure: This post may contain affiliate links.
A childhood (and adulthood) memory is in the making with today’s recipe. When we switched over to clean eating, things like Nutella became no-no’s for us due to its ingredients, but there’s no denying how…tempting that wonderfully nutty chocolate spread is. So once a craving hit, the only possible solution was to make my own in the simplest and cleanest way possible.
💕 Here’s why you’re going to love this recipe!
- This chocolatey hazelnut spread uses 5-6 clean eat ingredients.
- Compared to its name-brand sibling, this one is arguably much healthier for you (as far as a chocolate spread goes!)
- It takes less than 5-minutes to make if you have all ingredients on hand. (15-20 minutes if you have to make your own hazelnut butter).
- It is a great gluten-free, vegan and vegetarian friendly sweet treat.
- You can balance this recipe to suit your personal taste, do you prefer more nut butter? More sweetener? More chocolate?
- Pure, tasty, childhood (coughadulthoodcough) nostalgia…need I say more?
Making this homemade chocolate hazelnut spread requires the following ingredients:
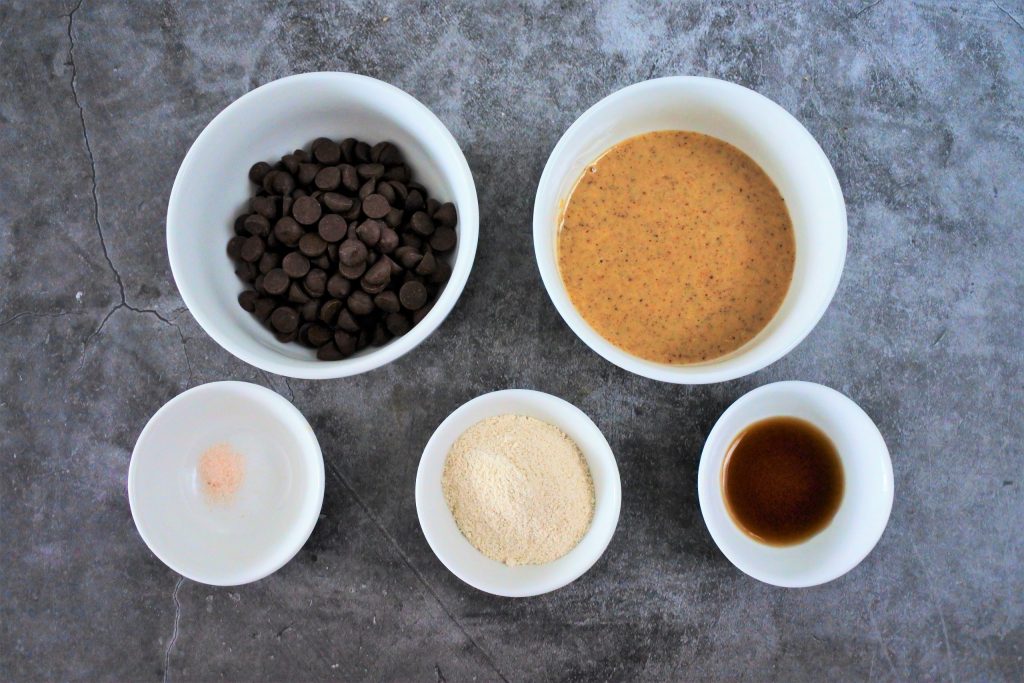
- Dark chocolate: Chips or chunks you can use any percentage that you prefer but I highly recommend 60% and up.
- Hazelnut Butter: A clean label store bought or Homemade (1-ingredient!) hazelnut butter is a must for this recipe. (Note: The smoothness of the hazelnut butter will dictate how smooth the spread is.)
- Vanilla Extract: This really amplifies the flavor and sweetness and perfectly complements both the chocolate and the hazelnut butter.
- Raw Cane Sugar: Raw cane sugar tends to be very granular with large grains so I like to blend it into a fine powder to make it easier to incorporate.
- Salt: I’m using a small pinch of pink Himalayan salt but you can also use a sea salt.
- Oil (not pictured): I like to use a bit of extra light olive oil but you can use any neutral tasting clean label oil of your choosing. The use of oil goes a long way in keeping the texture and consistency of the spread just right especially when storing it in the refrigerator.
Here’s how to make this spread:
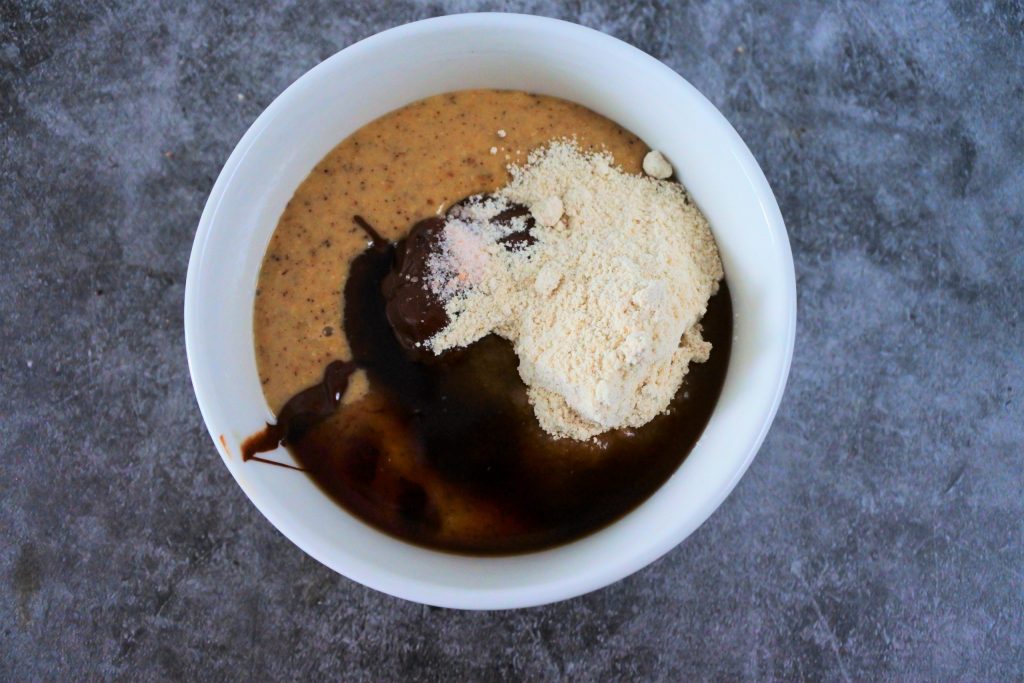
To make our hazelnut spread you first need to temper (melt) our chocolate either in a double boiler or in the microwave in 30-second increments until it is fully melted. Then we’ll add our melted chocolate to the hazelnut butter, along with our finely blended sugar, vanilla extract, and a tiny pinch of salt.

We’ll mix it all together and depending on the texture or the consistency, we will add in a bit of oil and blend it in. The oil will keep our mixture smooth and will keep it in a spreadable form.
If you want a smoother texture you can use a hand blender (aka stick or immersion blender) until your desired smoothness is achieved. Note that your spread will become very loose and liquidy due to the heat of the blades but once it cools down or is placed into the refrigerator to chill, it will set into a spread-like consistency.

This spread is pure childhood nostalgia that is sweet, nutty and delicious, and since it’s homemade and you know what went into it, you can now enjoy it all the more…maybe even eat twice the amount since it’s technically healthier than it’s original recipe? Isn’t that how this works? No? Just me? 😅
Speaking of indulgently decadent, I used some of this chocolate hazelnut spread to make my own “Nutella” Ice Cream that is honestly on the rich and decadent side and definitely something you’ll want to enjoy sparingly which just makes it all the most special if you ask me! Or, even better, pair it with some gluten-free pancakes or my gluten-free breakfast waffles for a wonderful pick-me-up treat!
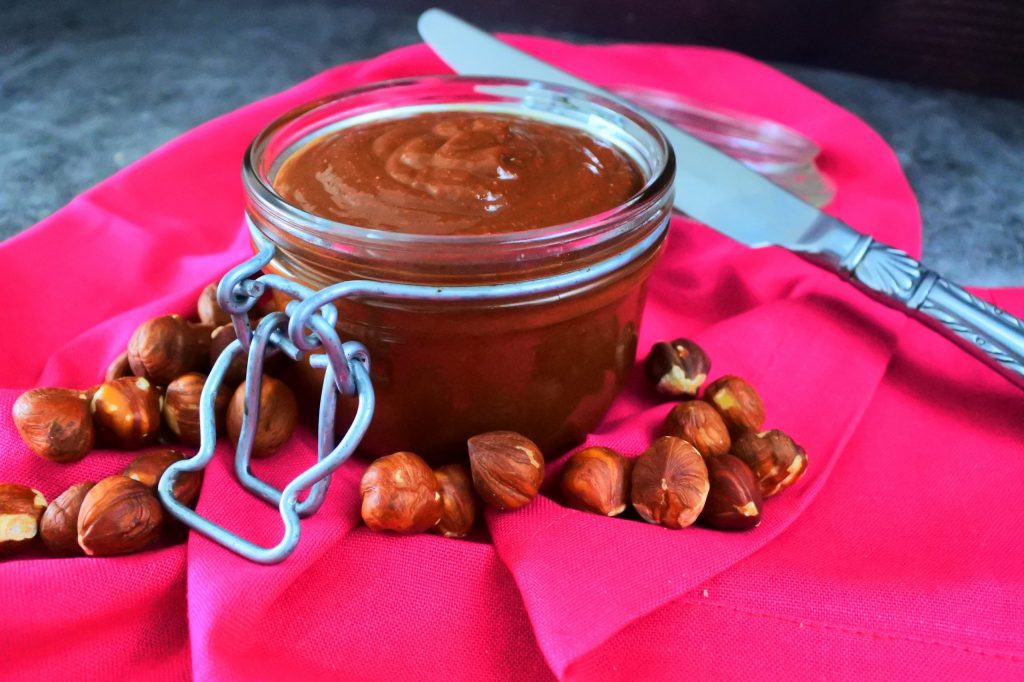
Chocolate Hazelnut Spread (Homemade Nutella)
Ingredients
- ½ cup hazelnut butter
- pinch Himalayan salt
- 2 tbsp raw cane sugar (ground into a fine powder)
- 1 tsp vanilla extract (optional)
- 1 tbsp extra light olive oil
- ⅓ cup dark chocolate (dairy-free chips, chunks, or morsels)
Instructions
- Add the finely ground sugar, vanilla extract, extra light olive oil, and salt to your hazelnut butter and blend to combine. You can also use a hand/immersion blender to process it into a smooth paste.
- In a separate bowl, melt and temper your chocolate. You can do this either by microwaving it in 30 second increments (stopping to stir at the 30 second mark) until melted (usually it takes a minute) or by using a double boiler.
- Add the melted chocolate to the sweetened and flavored nut-butter and blend until fully combined.
- Pour your chocolate-nut mixture into a container or jar and seal with an airtight lid. Store at room temperature for up to three weeks or in the refrigerator (it should thicken up but not harden into a block) for up to six weeks.
Notes
- While oils are okay, the addition of any water or liquid to the tempered chocolate or nut butter causes it to stiffen up and potentially seize into a clotted mass, so if using vanilla extract (or any liquid sweetener), be aware that your mixture will thicken up. If it's too thick, you can add a bit more oil to the mixture.
- Grinding the sugar into a fine powder allows it to quickly and easily blend and melt into the spread and reduces the risk of having a final product with a gritty texture.
Nutrition
If you tried this recipe out feel free to leave a comment below or reach out to us on social media (@kitrusycleaneat and #kitrusy) and don’t forget to snap and show off your pics by tagging us so we can celebrate your delectable creations together! 
