Disclosure: This post may contain affiliate links.

Summer is here and as the temperatures rise, now is the perfect time to break out your popsicle molds and freeze yourself a batch of refreshingly fruity pineapple popsicles!
🧊💕Here’s Why You’ll Want to Make This Amazing Treat Again and Again.💕🧊
- It’s a great and refreshing frozen treat to celebrate any warm summer day.
- They are clean eating, gluten-free, vegan and vegetarian friendly!
- It’s cheap and easy to make – and simple enough to be a great kitchen project with your little ones!
- They’re a healthy treat that is low in calories, fat, sugar, and a great way to enjoy a serving of fruit.
- They are far better than the store bought varieties that contain a lot of sugars, syrups, preservatives, additives, thickeners and stabilizers.
- They’re iconic and fun and all the cool kids are making them! Hellooooo Summer! 😎

Let Me Start With A Secret 🤫
Right off the bat I’m going to tell you the “secret” to making popsicles that aren’t hard and icy. And when I say hard and icy, I don’t mean just mean frozen, but I’m more referring to the texture when you bite into them you get shard-like splinters of crunchy frozen flakes. It’s unpleasant, and it’s what a lot of homemade popsicles sadly end up being and why the store bought versions always seem so much better.
So how do we avoid this? In short: We use a semi-frozen, semi-aerated base.

Let me explain: Most commercial popsicles rely on a mixture that contains a lot of sugar, syrups, stabilizers and thickeners (usually a gum/gel agent) that is used to stave off the formation of ice crystals once the freezing process starts. Thanks to mechanization they’re able to achieve this freezing process almost instantaneously through cooling the base to what’s called “water ice” (meaning it’s ice cold but not yet frozen), and then chilling it even further to force the base to instantly freeze. In short, what we learn from this is that the more fluid the liquid that needs to be frozen, the longer the freeze time and the higher the chance of ice crystals forming, growing, merging, and spreading (it’s why ice cubes are as solid as they are).
Now, at home we don’t have the benefit of this technology but we can take away a few key elements, namely: if our base interrupts the freezing process by already being semi frozen, and by having the mixture be aerated enough to disrupt the fluidity, it will stop the icy crystals from merging and forming into hardened splintery-flakes, thus we’ll be able to achieve a softer, bitable popsicle that has an almost creamy texture to it!
To keep this recipe easy to make and simple, we’re not going to bother using any stabilizers or thickeners, we don’t need them to be honest. Instead we’ll rely on 2 things: frozen fruit pulp for the base and a (mini) food processor.
To Make Our Popsicles We’ll Need The Following:

- Frozen Pineapple Pulp: You can get store bought packages of frozen pineapple pulp which is commonly used for making smoothies. They tend to be made from overripe fruit that has a very strong pineapple flavor and best of all contains no water, sugar, additives or preservatives, just 100% fruit! Since it’s pre-frozen and broken down, it can be used right out of the pack and is usually found in 14oz bags – perfect for 6 popsicles! HOWEVER! If you don’t have this on hand and you want to use fresh pineapple you absolutely can! Simply, peel, (remove the skin, the eyes and the core), chunk and blend your very ripe fruit into a puree, place it into a sealed, freezer-safe bag, be sure to spread into a flat sheet and freeze it until solid.
- Finely Blended Raw Cane Sugar: It may seem like we’re using a lot of sugar in this recipe, but our tastebuds tend to perceive sweetness less when things are very cold or frozen. In reality you can absolutely taste and adjust your preferred sweetness level to suit your personal taste.
- Vanilla Extract: Honestly, don’t skip this one! Vanilla perfectly complements the pineapple and enhances the flavor making your popsicle absolutely delicious. Trust me on this!
- Salt: The use of a small pinch of salt (Pink Himalayan Salt or Sea Salt) perfectly balances the flavor of the pineapple and enhances the vanilla and sugar, it’s a little touch that really goes a long way.
- Liquid: I’m using a small amount of slightly warmed homemade coconut cream as my liquid to help get my frozen fruit pulp moving so it breaks down and combines with the other ingredients and better and faster. I’m not using a lot of it so no coconut flavor comes through, this is still all about the pineapple. I also like using the coconut cream because of its fattiness which helps our popsicles be even creamier. That being said, you can also use full fat coconut milk, oat milk, almond milk or even just a touch of water if you like. One thing to note though is DO NOT use any dairy as your liquid! Since we’re using pineapple which contains the enzyme bromelain (the same enzyme that makes your tongue and mouth tingle when you eat fresh pineapple), you do not want to use any dairy-based liquid that contains proteins such as casein. When the two combine, the bromelain begins to break down and dissolve the casein and this results in a bitter flavor.
And finally, though not an ingredient, a mini food processor is paramount to combining and aerating our base to attain our desired texture. If you have enough base to fill your jug, you could also use a high powered blender to process the mixture, just be careful since we won’t be adding a whole lot of liquid to get the base moving which is why I prefer the processor.
Making Your Popsicles Are As Simple As…

Placing all your ingredients into the jug of your food processor, pulse and then process it until you have a smooth and creamy, semi-frozen soft-serve-like texture. If needed you can add the liquid in all at once or you can slowly stream it in as the frozen fruit pulp is processed.
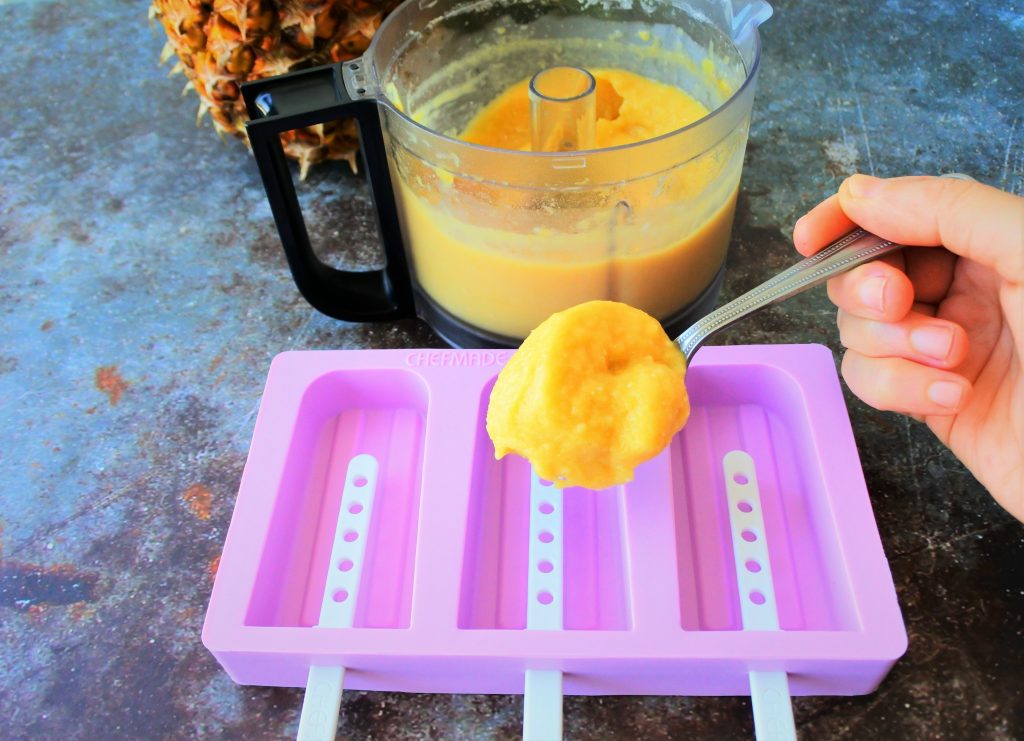
With your mixture smooth and fully blended together, scoop it out of the cup and fill your popsicle molds.
I was able to snag THIS particular one on sale and I am honestly in love with it. Not only is made from a thick and solid food-grade silicone which makes it easy to get the popsicles out, it also has reusable sticks and a cover so you can cover it and pop it into your freezer for easy storage and to minimize spills! Plus the shape is so wonderfully “popsicle-like”!
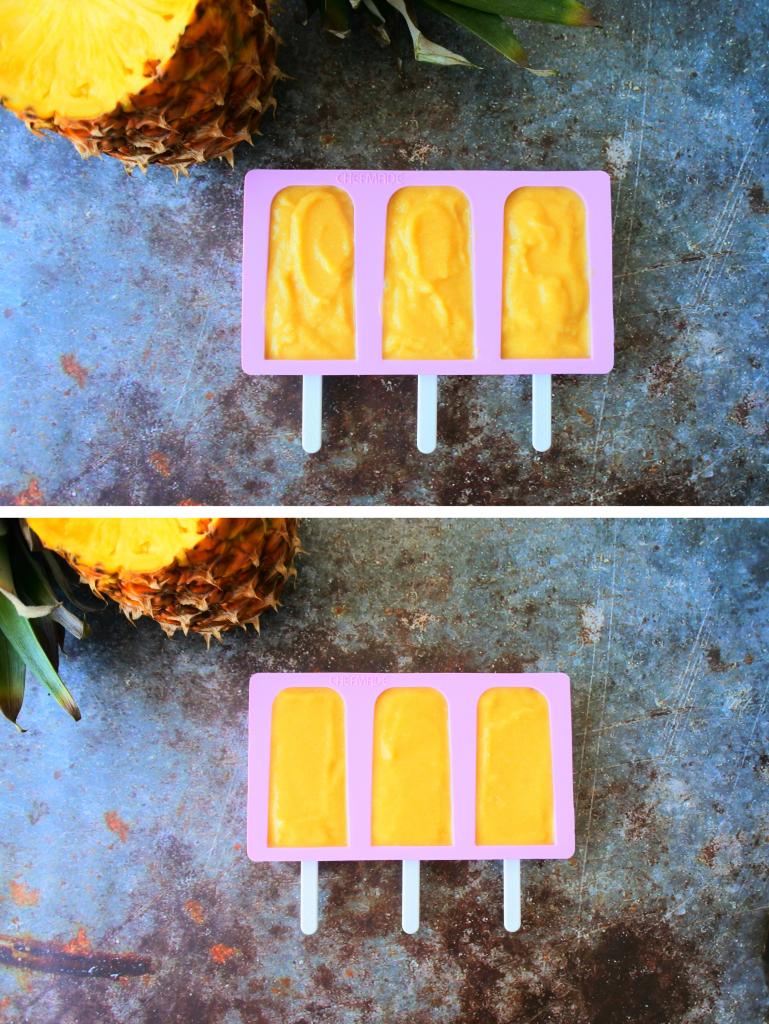
With your molds filled and smoothed out, pop your cover on and move your popsicles to the freezer where they will sit and set fully. This can take anywhere from 4-8 hours, so keep this in mind if you’re planning on a time to enjoy them.
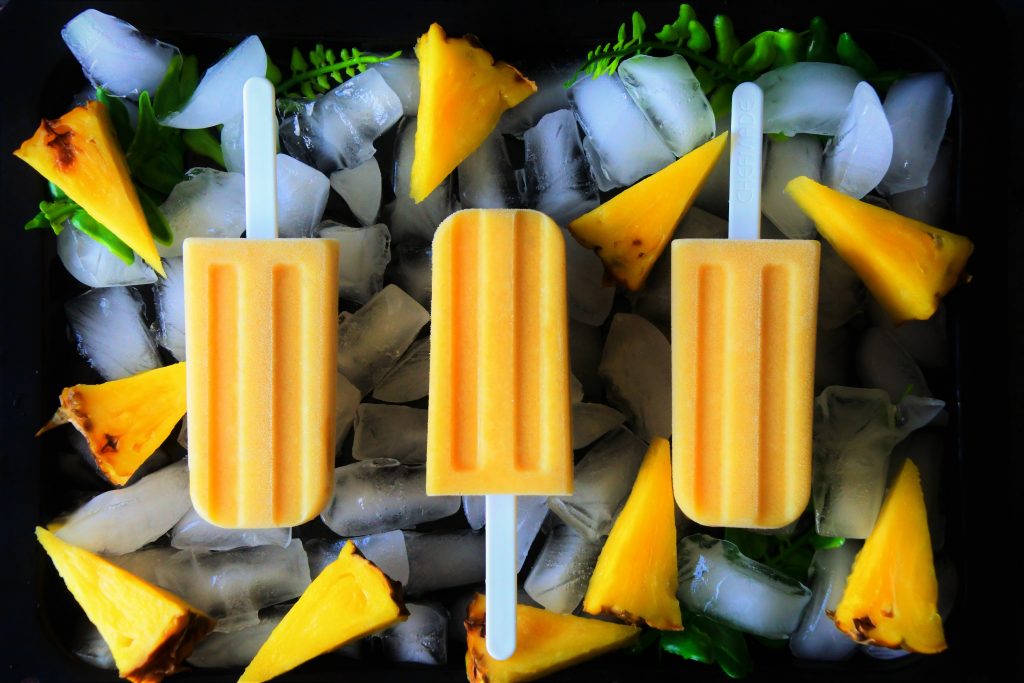
Once they’re set, all you need to do is unmold and enjoy!
But here’s another little not-so-secret secret, once you unmold them, let them “rest” for a few minutes before enjoying them. These few minutes will allow the popsicle to defrost just enough so that it’s not rock solid and instead you’ll be able to have a soft, wonderfully velvety bite!

Did you make this wonderful summery treat? Did you enjoy it as much as we do? Let us know by leaving a comment and rating below, or by connecting with us (@kitrusycleaneat and #kitrusy) and don’t forget to show off your pics and tag us so we can celebrate your delectable creations together! Happy Summer! 🌞😎🧊

Simple Summery Pineapple Popsicles (Small Batch)
Equipment
Ingredients
- 7 oz pineapple pulp frozen (if using fresh pineapple see notes)
- 1 tsp vanilla extract
- 2-3 tbsp raw cane sugar finely ground (to taste - see notes)
- ⅛ tsp Himalayan salt
- 2 tbsp coconut cream or coconut milk or any non-dairy milk or water
Instructions
- Add the frozen pineapple pulp, vanilla extract, salt and sugar into a mini food processor. If preferred, you can add in the liquid coconut cream all at once or you can stream it in little by little as your blend and process the fruit pulp.
- Process until the mixture is broken down and has a smooth and creamy soft-serve texture to it. If needed you can add in a tsp or two more liquid.
- Pour or spoon your mixture into your popsicle mold. Set to freeze for 4-8 hours or overnight.
- Unmold and let your popsicle rest at room temperature for a couple minutes before enjoying for the best textural results.
Notes
- This recipe is a small batch that makes enough to fill three 2.5 oz popsicle molds. Adjust your recipe to suit your popsicle mold's capacity.
- Do NOT use any dairy-based liquid in your popsicle as the natural enzymes in pineapple will react with the proteins in the dairy and create a bitter taste.
- Adjust your sugar preference to taste, but keep in mind that sweetness levels are slightly muted when it comes to cold drinks and foods so once your popsicles are frozen they will taste less sweet.
- If using fresh pineapple, peel, and puree the pineapple. Bag and seal it and allow it to freeze until solid.
- The 7-oz of pineapple pulp is measured by net weight.
