Disclosure: This post may contain affiliate links.

These homemade Butterfinger candy bars tastes just like the real thing but uses clean pantry staple ingredients and can be whipped up at home in no time. Trust me when I tell you that there’s absolutely no need to be intimidated by this recipe as it’s honestly quite forgiving. Don’t believe me? Give it a try and see for yourself!

A Bit About This Recipe
One of the best things about having awesome neighbors is that they are often willing to take on the role of taste testing and are more than willing to give honest critiques, so when I took over some of these butterfingers and was informed that “these are my favorite candy bars!” you know I started sweating bullets. However after one bite, a nod of approval and a “it tastes just like a Butterfinger to me!” I was able to wipe the sweat of my brow and feel confident enough that I’d just about nailed this recipe!
Now while we like to keep things clean and simple around here, I will not tout that this is a “healthy” recipe by any means, let’s be real, it’s a sugary, peanutty candy bar, but what I will say is that we’ve been able to (successfully) replicate the original version using just 8 simple and clean pantry staple ingredients.
Candy making is always a precise science but this recipe is honestly as easy as can be. The flaky inner core is essentially a honeycomb candy that has peanut butter folded into it that’s set to cool before being covered in chocolate. That’s really it. Very easy and very forgiving when it comes to the temperature, a few degrees more or less will not impact your final product and honestly it’s both fun and satisfying to make!

Here’s Why You’ll Love This Recipe!
- It’s made using just 8 pantry staple ingredients.
- It contains NO corn syrup, no additives, no preservatives and no artificial anything.
- It’s clean eating, gluten-free, and vegetarian friendly.
- Dipping the flaky peanut butter cores is a great activity to do with your little ones.
- It’s way easier to make than you might think.
Ingredients

- Dark Chocolate: I’m using a dark chocolate for this version but honestly you can use any kind of chocolate you prefer from milk to semi-sweet, to any % of dark or a mixture of chocolates.
- Sugar: I am using evaporated cane juice sugar but you can also use raw cane sugar or pure cane sugar.
- Honey: You can use any kind of honey you’d like. I personally love the mild flavor of wildflower or citrus honey.
- Natural Peanut Butter: While you should be able to use any peanut butter for this recipe, I highly recommend using a natural peanut butter that contains just peanuts and sometimes a small touch of salt, just be sure that if any oils have separated from it it is fully mixed back into the peanut butter.
- Water: We only need a small splash of water for this recipe. It may seem insignificant but it adds hydration that helps our honeycomb candy set up properly.
- Vanilla Extract: a small bit of vanilla extract really adds a great depth of flavor to our candy bar’s core.
- Baking Soda: A critical ingredient, be sure you’re using baking soda and NOT baking powder, the two are not interchangeable. Our baking soda is what aerates our honeycomb candy and gives the candy bar that iconic flaky candy core.
- Salt: A small touch of salt balances the sweetness of the treat and enhances all other flavors from the chocolate to the peanut butter to the vanilla.
A great finishing touch for this candy bar is flaky salt, a small pinch over the top of the bars before the chocolate sets can really take your bars to another level.
Let’s Make Our Butterfinger Core

To a 2.5qt saucepan, add your honey, sugar, salt and the splash of water and set it on a medium-low heat. Now be sure you’re using a deep pan because this candy mixtures will froth and bubble up when we add the baking soda later to make the honeycomb.
Let your mixture simmer until it reaches about 270F on a thermometer.

When your thermometer hits 270F, warm your peanut butter in the microwave in a heat safe bowl for about 30 seconds until it’s just slightly warmed, this is necessary to not shock your honeycomb mixture or make it cool too quickly.

When your thermometer hits about 280-290F, add your baking soda to your vanilla extract and stir it together.

When your thermometer hits 285-F290F, remove your pan from the heat and add in your vanilla and baking soda mixture and stir it. It will rapidly begin to froth up, this is why having a large enough pot is crucial!

Stir your mixture for about 5-10 seconds until it is completely frothed and aerated…

And then working quickly but carefully, scrape all your honeycomb mixture over your warmed peanut butter and fold it in until it is completely incorporated. Your mix might look ribbon-like and stringy, that’s normal. As you continue to fold the candy, you’ll see it starts to clean the bowl and look almost like a dough.

At this point, pour your candy mixture into a heat-safe dish lined with parchment. You can use any shape dish you like, though I recommend using one that has straight edges so that cutting the candy bars out when it cools later on is easier. I am using a 6″ x 9″ glass dish.
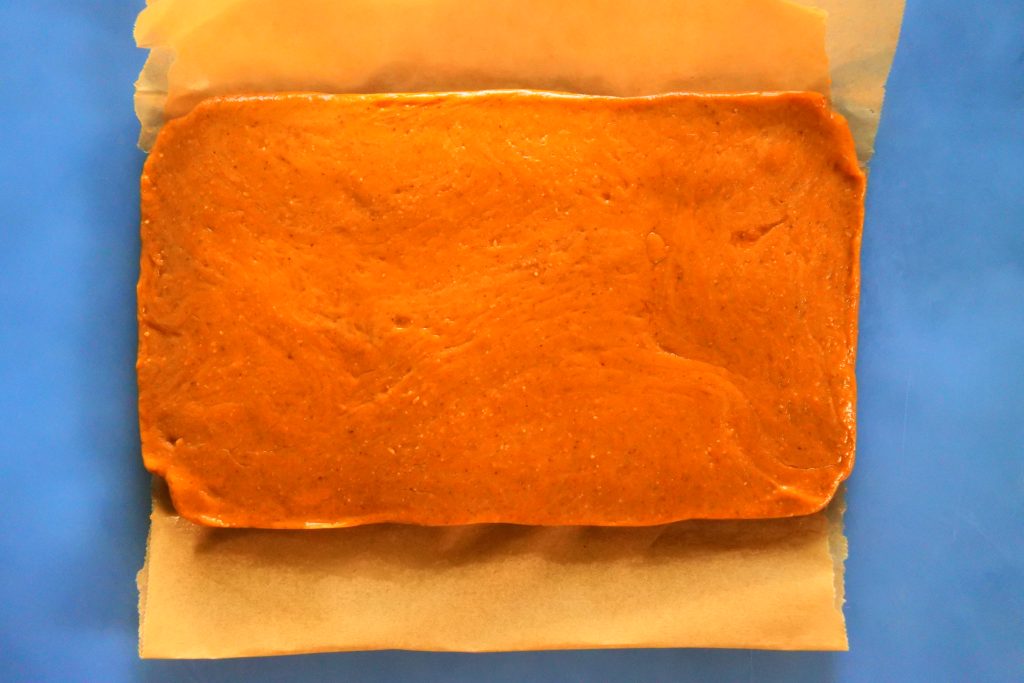
Once your candy mixture is cooled enough to hold its shape once you lift it out from the dish but is still somewhat soft we’ll cut it into our bars.

Using a sharp knife, cut your candy mixture into whatever size bars you’d like. My 6×9 dish shape gave me 14 shorter bars. Once your candy is cut, let it cool completely for at least an hour at room temperature. While it might be tempting to stick them in the fridge to cool, if they’re too cold they will “shock” your chocolate when you dip them in to coat them.
Time to Take a Chocolate Bath

Once your peanut butter candy is cooled, we’ll temper/melt our chocolate. I recommend using a small bowl so that you can get a taller dip pool for your bars.
You can temper your chocolate in a bain-marie (aka double boiler) or you can use the microwave for a quicker and easier option. To do this method, simply place 9 out of the 10 oz of chocolate into a microwave safe bowl and microwave it on 30 second blasts. Be sure you take it out and stir it after each of the 30 seconds. Even if it still looks solid after the first 30, stir it and mix it before putting it back for another 30 seconds. After 3-4 times of doing this (a total of 90-120 seconds) your chocolate should be melted and glossy. For my microwave it took me a total of 3 times – so 90 seconds – to fully melt down.

Then add back in the remaining 1 oz of chocolate we set aside earlier and stir, stir, stir until they are fully melted. Once it’s incorporated your chocolate is ready to be used.

Place your cooled peanut butter core into your chocolate and using a fork rotate your bar to fully coat them. When you lift them out, you can use a butter knife to smooth and spread your chocolate into a thin and even layer and use it to gently shift it off the fork and onto a parchment-lined plate.

With your bars fully coated and on the parchment, set them aside to cool, if your chocolate is properly tempered it should begin to harden in about 5 minutes and stay cooled and shiny. Similarly, you can place your chocolate bars into the fridge if you’d like however note that it will make your chocolate a lot harder but the inside will remain wonderfully flaky and crisp.

And there you have it, a super easy homemade Butterfinger that rivals the “real thing” but uses wholesome and clean ingredients. We hope you give this recipe a go and that you love it as much as we do!

Homemade Butterfinger Candy Bars (No Corn Syrup, GF, 8 Simple Ingredients)
Ingredients
- 1/2 cup evaporated cane juice sugar or pure cane sugar or raw cane sugar
- 1/4 cup honey
- 3/4 tbsp water
- 1/4 tsp Himalayan salt
- 3/4 cups natural peanut butter
- 1 tsp vanilla extract
- 1/4 tsp baking soda
- 10 oz dark chocolate chips or semi or milk if preferred
- Flaky salt Optional
Instructions
- Start your Honeycomb Candy: Add sugar, honey, salt and water to a 2.5qt pot, bring to boil over medium-low heat and bring up to 290F1/2 cup evaporated cane juice sugar, 1/4 cup honey, 3/4 tbsp water, 1/4 tsp Himalayan salt
- Prep the Peanut Butter: When honey mixture is at about 270°F, add your peanut butter into a large heat safe bowl and warm in the microwave for 30 seconds until just warmed and set aside.3/4 cups natural peanut butter
- Finish the Honeycomb Candy: Mix the baking soda into vanilla extract and add this to honey mixture when it reaches 258-290℉. Quickly stir your mixture for 5-10 seconds. It will rapidly froth up and aerate - this is why a deep set pot is essential.1 tsp vanilla extract, 1/4 tsp baking soda
- Shape and Cool the Honeycomb: Scrape the honeycomb mixture into the bowl with the warm peanut butter and fold the mixture together until fully combined. It will look stringy at first and then should begin to clean the bowl and appear almost like a dough.
- Spread this mixture into a small 6x9 baking dish lined with parchment and let cool for about 15 minutes until it is set enough to be lifted from the baking dish but hold it's shape. It should be semi cooled but still somewhat soft.
- Cut the Honeycomb into Bars: While it is still semi warm, cut the candy into 14 strips using a sharp knife or whatever size strips or shapes you prefer. Once cut, set it aside to cool completely for about 45-60 minutes at room temperature.
- Temper your Chocolate: Add 9 of the 10oz your chocolate to a microwave safe bowl and temper it by microwaving it for 30 second intervals, being sure to stir between each of the 30 seconds. It should take about 3-4 rounds (aka 1.30 - 2 minutes total) Once the chocolate is fully melted, add in the remaining 1oz of chocolate and stir until it is fully incorporated and melted.10 oz dark chocolate chips
- Dip your Bars: Dip your cooled, room temperature peanut butter bars into the chocolate and evenly coat all sides. A great trick is to use a fork to dip and turn the bar with and a butter knife to gently scrape off any excess and ensure a smooth and even layer on all sides.
- Let the Chocolate Set: Place the chocolate covered bars onto a parchment lined tray or plate and sprinkle the tops with a touch of flaky salt (optional). Let your bars cool and harden. Tempered chocolate should take about 5 minutes to cool and should be shiny. You can also place or keep your bars into the fridge.Store your bars in an airtight container at room temperature or in the fridge.Flaky salt
Notes
- If preferred you can temper your chocolate using a bain-marie or double boiler.
- See recipe post for various other tips and tricks as well as step by step directions with images.
