Disclosure: This post may contain affiliate links.

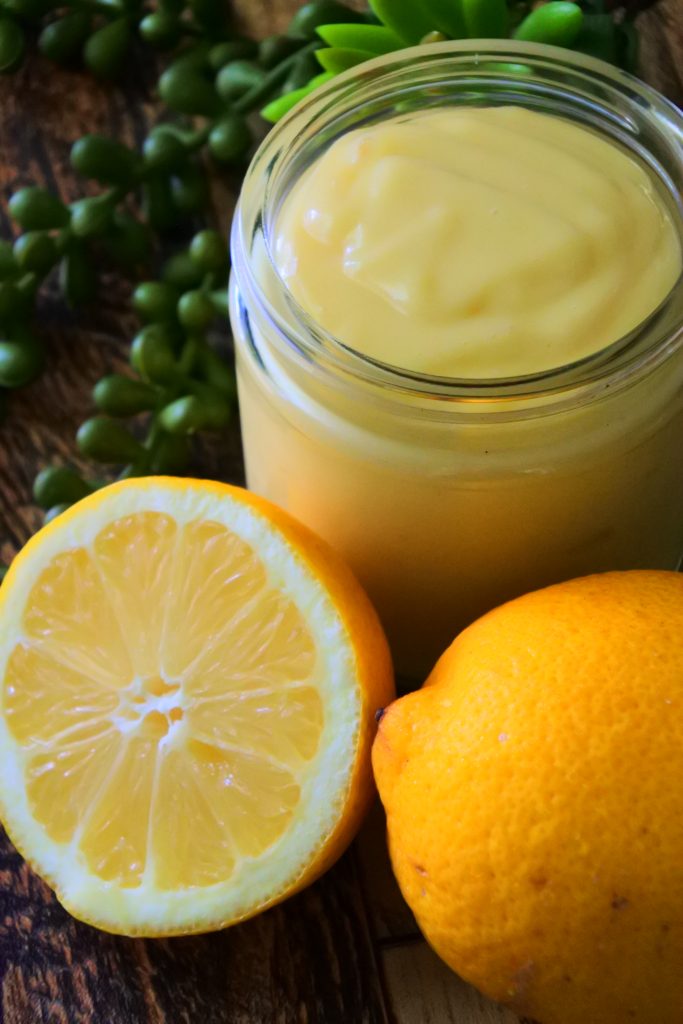
Clean eating, gluten-free, and lacto-ovo vegetarian friendly, this easy lemon curd requires just 5 simple pantry-staple ingredients and can be whipped up in no time. Sweet and tart, you can enjoy this versatile filling in a variety of ways so without further ado let’s get right into it!
Ingredients Needed
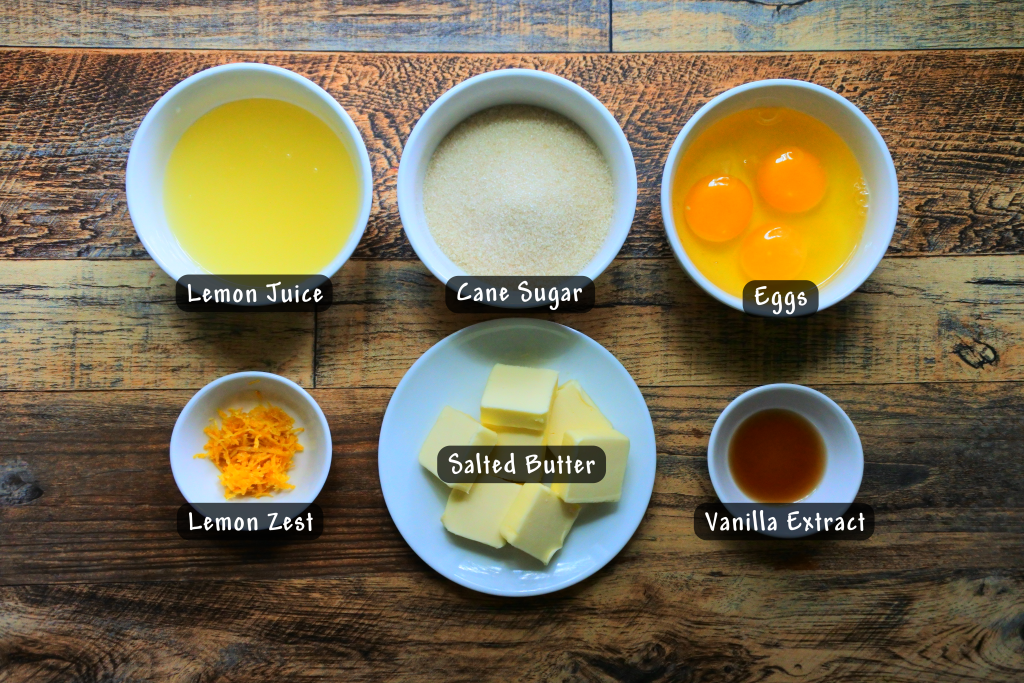
- Lemons: For this recipe we’ll need fresh lemons since we’ll be using both the lemon juice AND the lemon zest. I don’t recommend using bottled lemon juice for this, the addition of citric acid will not give you the right set or flavor.
- Sugar: I’m using evaporated cane juice sugar for today’s recipe but you can also use raw cane sugar that’s been finely blended.
- Eggs: I’m using US standard whole large eggs.
- Salted Butter: I’m using salted butter for today’s recipe but if you’re using unsalted butter (which you absolutely can) be sure to add a small pinch of salt to your curd mixture.
- Vanilla Extract: Arguably optional, the addition of vanilla extract adds a great layer of flavor that is perfectly complemented by the tartness of the lemons so I highly recommend you use some.
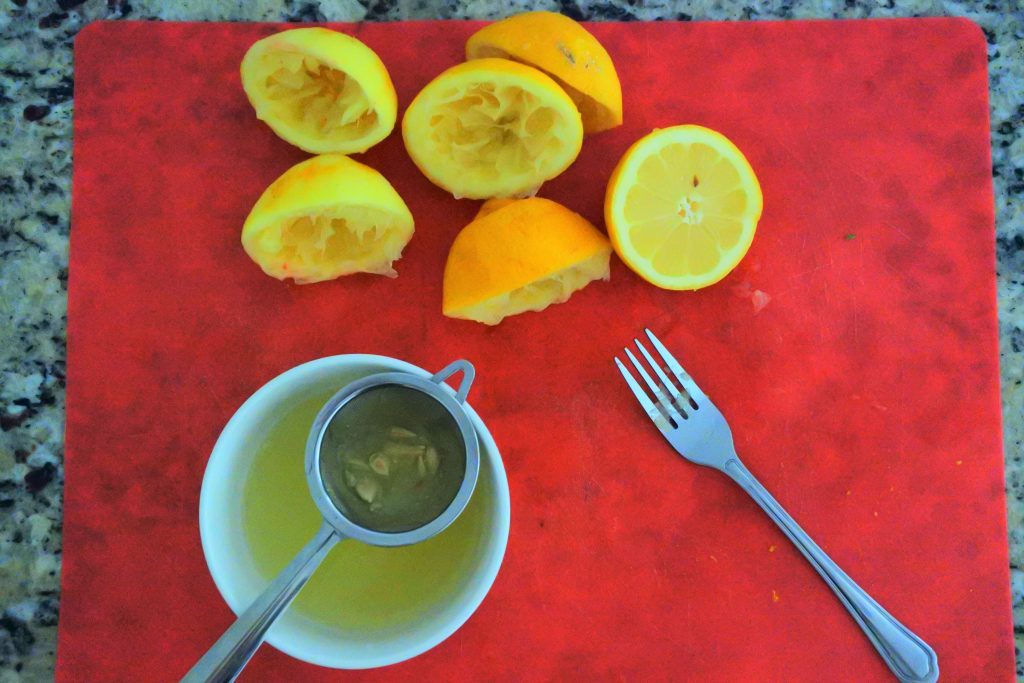
Pro-tip! Get the zest from the lemons first before juicing. This will make it easier than trying to zest an already juiced lemon half. Also, be sure to strain your lemon juice to remove any pulp or seeds.
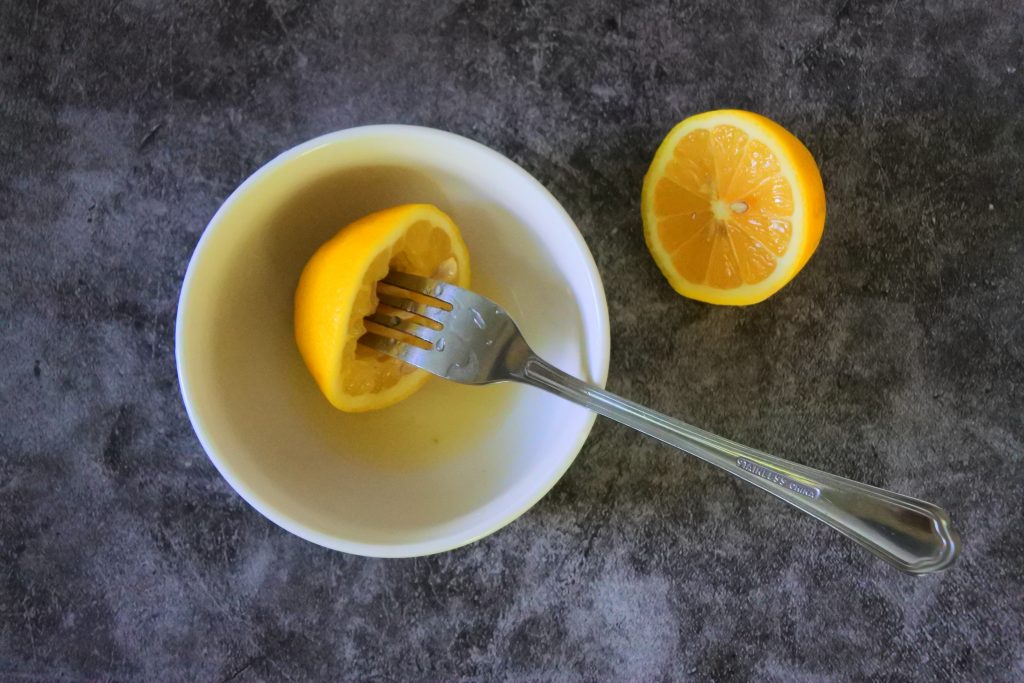
If you don’t have a juicer and are juicing your lemons by hand, a great and easy way to extract the juice is to insert the tines of a fork into the cut face of the lemon and then, while squeezing the lemon half with one hand, gently wiggle and work the fork side to side to allow all of the juice to easily flow out. If you like you can then rotate the half 90 degrees and do it again so you get every last zesty, tangy drop of gold!
How to Make this Easy Lemon Curd
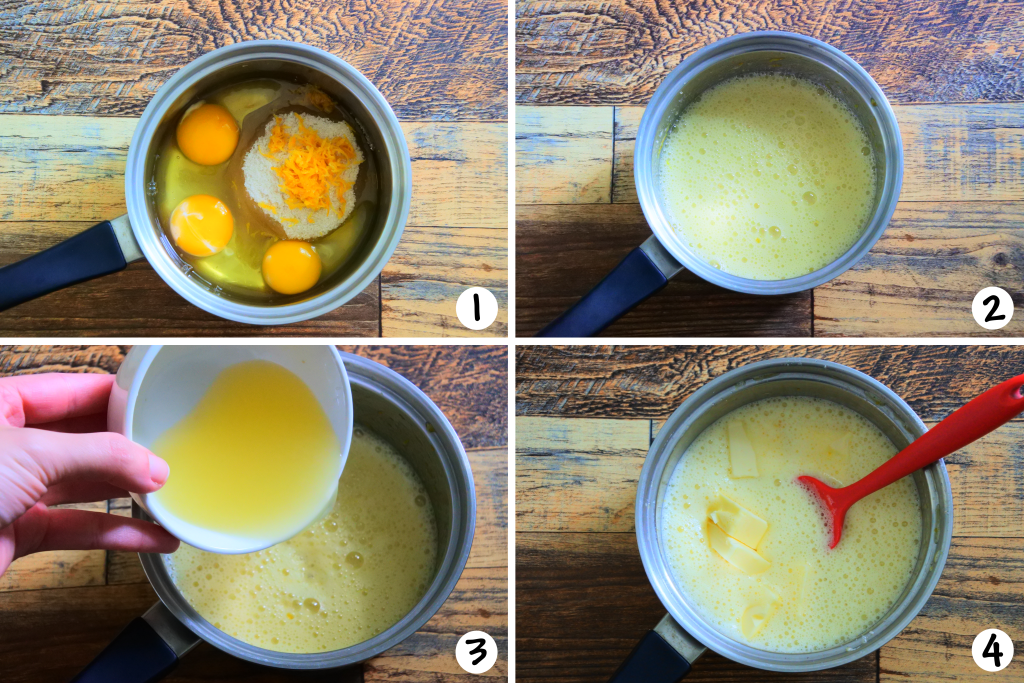
To a small saucepan with a heavy bottom, add your eggs, sugar, and lemon zest (1) and using whisk (electric works best) whisk it until fully combined and frothy (2). Then, whisk in your lemon juice and whisk again until it starts to thicken slightly (3). Add all your butter pieces to the pot and place it onto your stovetop (4).
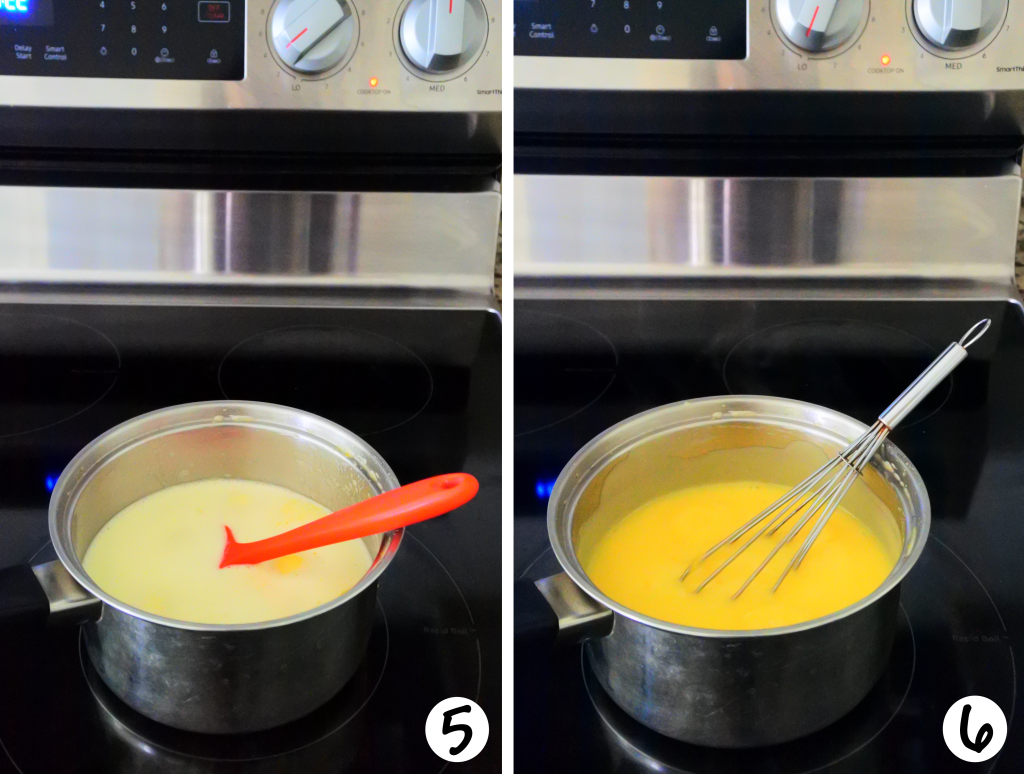
Once you place your saucepan on the heat, you want to put it on the lowest setting possible. I cannot stress this enough. DO NOT USE HIGH HEAT. If you do, your lemon curd will fail and will become chunky or split.
Double Boiler: If you know that your particular stovetop runs too hot even on the lowest setting then a great and simple solution is to make a double boiler to ensure that your curd is cooked gently. To do this, simply fill a pot with an inch or two of water. Bring that water to a simmer and then place a heat-safe bowl (glass or pyrex is the best option) with your lemon curd mixture in it that is slightly larger than the pot over the simmering water. This will allow the steam of the simmering water to gently heat the bowl and cook your lemon curd.
Stir until the butter melts and once it does, begin to whisk it constantly while keeping it on low heat for about 8 minutes until your curd thickens up enough to coat the back of a spoon to the point where if you draw a line through the curd-coated spoon, it’s thick enough to not run or fill in the line and doesn’t run and drip off the spoon. If you have a thermometer, it will be around 170F.
Do not overcook your curd, as that will cause it to be grainy.
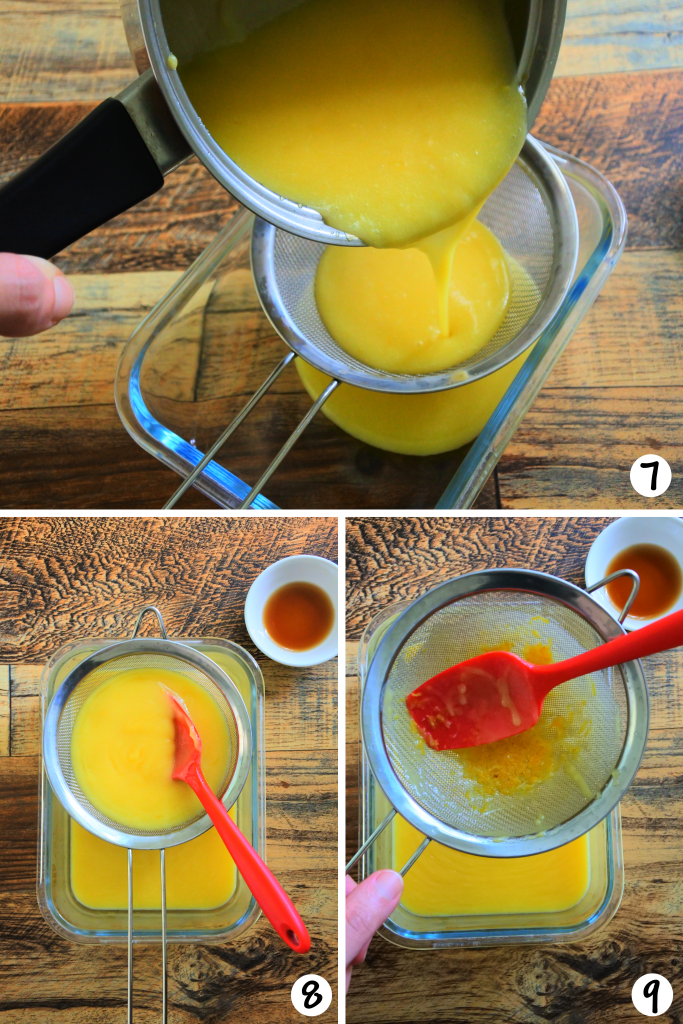
Strain your lemon curd by pouring it through a fine mesh strainer to remove the lemon zest and any bits of egg that may have solidified (8). We want our lemon curd to be as smooth and silky as possible. Using a spoon or spatula, press the mixture through the strainer to encourage it through (9). Discard any solids in the strainer.
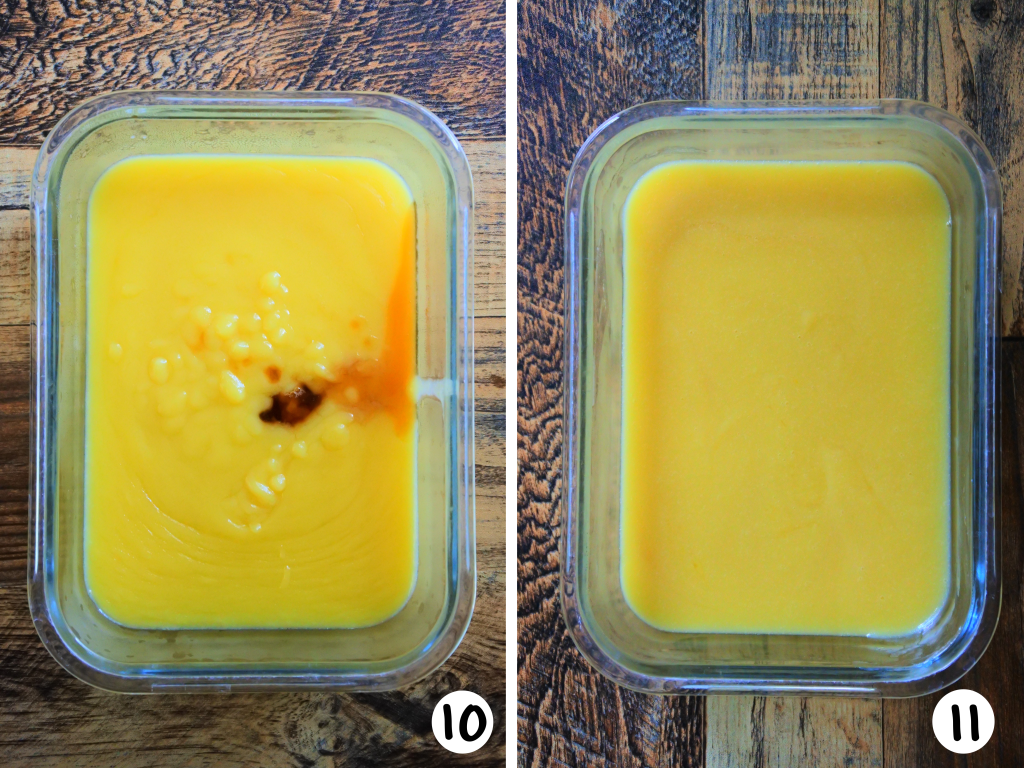
Add your vanilla extract to the strained lemon curd and mix it in (10), then, allow your lemon curd to cool to room temperature (11) before placing it in the fridge to chill and set up completely – I recommend at least two hours of chill time but longer would be even better. If you like, you can place a piece of food-grade plastic wrap over the surface to prevent a skin from forming.
Troubleshooting Tips and Tricks
Lemon Curd is Grainy or Lumpy
- Possible Reasons:
- The main reason is that your heat was too high, you need to ensure that you keep it on a low heat throughout the heating process. Using a high heat will not speed up the process. Low and slow is the key here.
- Another reason may be that you overcooked it or kept it on the heat (even low) too long. You want to ensure that you cook it as long as is needed to thicken it enough to coat the back of a spoon to where if you swipe a line through it the lemon curd is thick enough to keep the shape without dripping of running off or filling in the line (this happens at about 170F).
- The third reason is that you didn’t whisk or stir it enough throughout the process so instead of blending into a smooth creamy curd it becomes lumpy.
- Solution: Your best bet in this scenario is to use a stick blender to blend it until it’s smooth and then strain it through a fine mesh strainer a couple times to try to get it to the right texture and remove any solid bits.
Lemon Curd Isn’t Thickening Up
- Possible Reason: You didn’t (slowly) bring it up to the temperature needed to have your curd set. That said, when it’s finished cooking, your lemon curd may seem thin in the pot but as long as it has been brought up to about 170F and can coat the back of a spoon without dripping off and you can run a line through the curd on the back of the spoon and it doesn’t fill in that line, your lemon curd is at the right texture and will continue to set and thicken as it cools and then even more as it chills in the fridge.
- Solution: Reheating your lemon curd is the solution to thicken it up. Depending on how much thickness you need you can try the following:
- If your curd just needs to be thickened up a bit more then you can add it back to a saucepan on low heat and cook it whisking constantly until it just starts to bubble, then once it cools and sets up it should thicken.
- If you need a bit more thickening power, then you can add in 1-2 tbsp more butter while you heat it on low heat, once it cools the additional butter will help it set and thicken up.
- If your lemon curd is runny, then, while whisking constantly on low heat, you can add in an extra egg yolk (or two if it is completely runny) and bring your lemon curd up to 170F or until it coats the back of a spoon. Then let it cool and then chill again.
Lemon Curd is Too Thick
- Solution: If your lemon curd sets up too thick you can thin it out simply by adding 1-2 tsp more lemon juice and mixing it in. There’s no need to reheat your curd as this will make it even thicker, simply add the lemon juice to the cooled curd.
Lemon Curd Split
- Possible Reason: The main reason for this is that you cooked it on too high a heat and didn’t whisk it enough which didn’t allow the eggs to emulsify enough to bind the lemon curd together so you end up with what looks like a greasy mess with chunks of scrambled egg in it.
- Solution: Reheat your lemon curd mixture on low heat once more and whisking it until it’s somewhat smooth then add in a tsp or two of lemon juice and keep whisking until it comes together once more and begins to set up enough to coat the back of a spoon. Then strain it 1 or two times to remove any solid chunks if any are left and let it cool and then chill.
Lemon Curd is Bitter
- Possible Reason: The main reason your curd might be bitter is that you included too much of the white pith of the lemon with the zest.
- Solution: You want to be sure you’re just getting the thin layer of zest on the outside of the lemon and not any of the white pith underneath.
Lemon Curd Tastes Metallic
- Possible Reason: If you used a cheaper metal pot, bowl or even whisk then the acidity of the lemons could cause the metal of the pot/bowl to leech into the lemon curd.
- Solution: While there’s no fix for this, you can prevent it beforehand by using a good quality metal pot or bowl or one that is made of heat-safe glass or ceramic and using a silicone spatula or whisk.
How to Enjoy your Lemon Curd
This lemon curd is insanely versatile and can be enjoyed numerous ways such as:
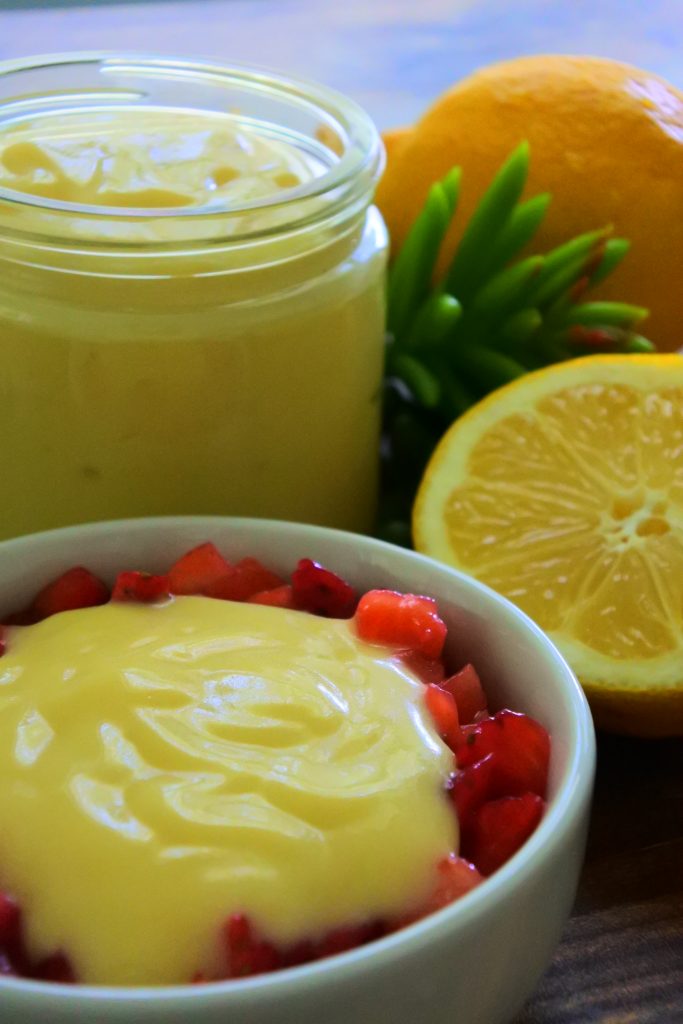
- By itself – enjoying a spoonful right out of the jar is a great treat!
- As a topping for fresh or macerated fruit – like in the above image of strawberries that were coated in sugar and left to macerate for an hour.
- As a spread for crepes and pancakes
- As a filling for pies and tarts
- In lemon bars
- As a filling for cupcakes and donuts
- Between layers of cake
- As an ice cream topping or
- Swirled into your ice creams
- As a layer in parfaits
- Swirled into your morning yogurt
How do you like to enjoy your lemon curd? Let us know in the comments below!

Easy 5 Ingredient Lemon Curd
Ingredients
- 1/2 cup evaporated cane juice sugar or finely blended raw cane sugar
- 3 lg eggs US standard sized
- 1 tbsp lemon zest about one lemon
- 1/2 cup lemon juice fresh squeezed, about 3 lemons
- 6 tbsp salted butter
- 1 tsp vanilla extract or paste
Instructions
- To a small saucepan add the sugar, eggs and lemon zest and whisk until fully combined, light, and frothy.
- Add in the lemon juice and whisk again until it starts to thicken slightly.
- Add the butter and place the pan on low heat and allow the butter to melt stirring while it does. Once the butter is halfway melted begin to stir/whisk continually for about 8 minutes.
- Once the lemon curd begins to bubble, turn off the heat, and keep whisking for another minute or two. It should thicken up enough to coat the back of a spoon.
- Pour your lemon curd through a fine mesh strainer and into a glass jar or container and press it through to remove the lemon zest and any solids.
- Stir in your vanilla extract to the strained lemon curd and allow it to cool to room temperature before placing it in the fridge to chill and set up for at least 2 hours.
- Keep your curd stored in an airtight container and in the fridge for 5-7 days.
