*Mandatory disclosure #1: A lot of cookies were eaten in the making of this recipe.*
*Mandatory disclosure #2: This recipe requires you to rest the dough for 12-24 hours. But trust me that it is oh-so-worth it.*
*Mandatory disclosure #3: This post may contain affiliate links.*

Ahhh, the chocolate chip cookie.🍪
Warm, with a soft, not-quite-set middle, and edges that are slightly crunchy and chewy, all pocked with morsels of gooey, melted chocolate. It’s an ode to all things wonderful and delicious.
This seemingly simple drop cookie was invented in the late 1930s in the US when Ruth Wakefield dreamed up the recipe as a variation to her butterscotch cookie, and from that moment forward, the chocolate chip cookie became one of the most iconic cookies out there.
For the longest time my Gluten-Free Almond Flour Chocolate Chip Cookies recipe was my go-to cookie recipe and that remains true even now, especially if I want a cookie right away, but every so often I get a craving for a more traditional cookie, one that makes you feel like you’re cheating in the best of ways. One that is addictively satisfying. One that you look at and completely salivate over. 🤤 And with that in mind this recipe was born.
Let me tell you why you absolutely have to give this recipe a try:
- They’re clean eating and vegetarian friendly.
- They’re made using wholesome ingredients such as whole wheat flour, raw cane sugar, and dark chocolate.
- The dough can be frozen and stashed away so you always have cookie dough on hand that can be baked as needed. Hello fresh baked goodness!
- They are addictively good.. seriously…
- You know what, I’m sure you already know how AMAZING chocolate chip cookies are/can be, so I’m sure I don’t need to say anything more on the matter, do I? 😉
To make our cookies we’re going to need the following ingredients:
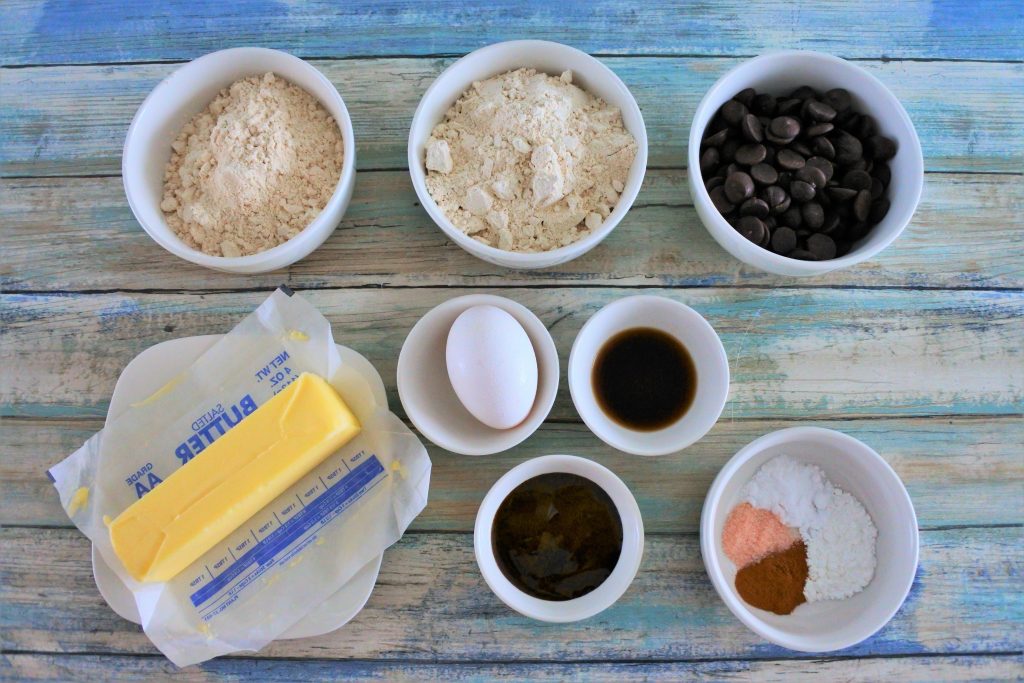
- Whole wheat pastry flour: 100% whole wheat goodness made from a soft white spring wheat for a finer texture and mild flavor.
- Raw cane sugar: Natural sweetness that comes from freshly harvested cane juice that has been crystallized and spun in a centrifuge, this sugar tends to have large grains. As such, you’ll need to blend your sugar in a high powered blender to break it down into a fine powder.
- Dark chocolate chips: Or chunks. Opt to use anything from 60-80%. If you want to be REALLY fancy, you can use a bar of high quality chocolate that’s been cut into irregular chunks. This will add some textural variance and give your cookie that artisanal look to it!
- Butter: I’m using a salted butter but you can use unsalted if you prefer. Ensure that your butter is either at room temperature or softened.
- Egg: A large egg that’s been in the fridge works best. The cold egg helps the butter (that we’ve been mercilessly creaming with the sugar) to cool down and set up slightly. Trust me, it helps.
- Vanilla Extract: This adds flavor and helps to amplify the flavors of the other ingredients. Without it, our cookies will be on the blander side and you’ll find yourself thinking that they’re good but they’re missing *something*.
- Molasses: I’m using an unsulphured variety. In my experience, blackstrap molasses is thick and has a lower moisture content and tends to affect how our butter and sugar creams, so I recommend avoiding this kind for this recipe.
- Baking Powder and Baking Soda: Our rising agents. The baking powder is dual action and reacts to liquid and heat while our baking soda is a base that reacts to acid. In this recipe the baking soda reacts with the molasses to help give our cookies rise and spread. The combination also works well since this dough rests overnight.
- Salt: I’m using a pink Himalayan but you can also use a sea salt.
- Cinnamon Powder: This is a bit of a personal secret ingredient that really makes this cookie special. We’re using just a little bit but the flavor mingles so well that whoever enjoys one of these cookies will taste *something* amazing but I’m betting they’ll be hard pressed to guess what it is. Not a fan of cinnamon on the whole? You can sub the cinnamon for baking espresso powder which is known to amplify the flavor of chocolate.
Let’s get to making our cookie dough…
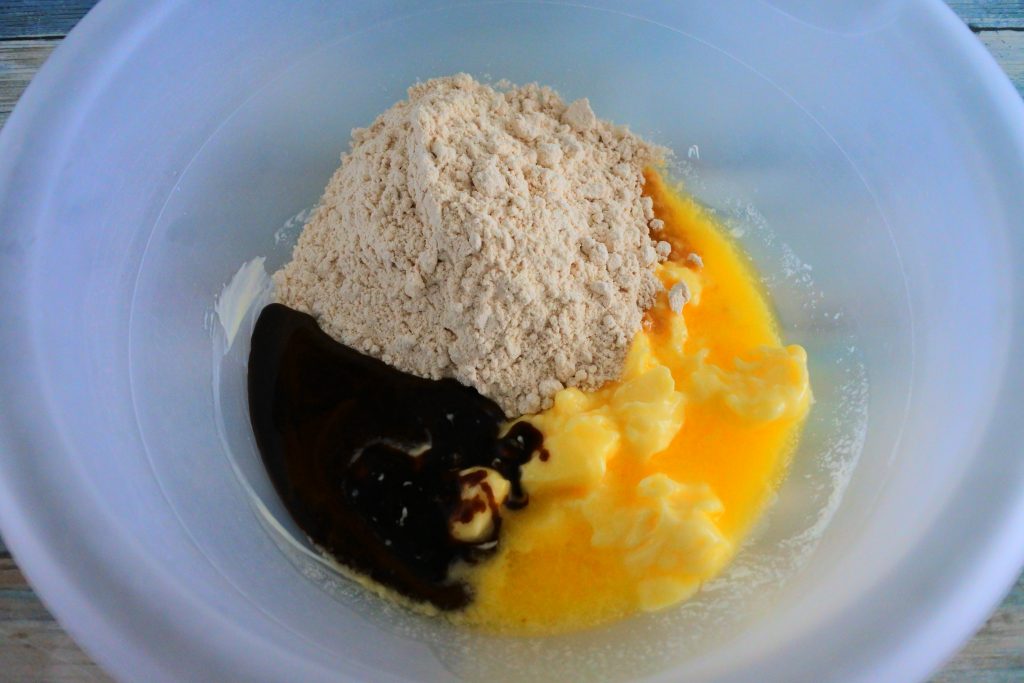
Now, to make our dough we’ll combine our softened butter, finely blended sugar, and our molasses.
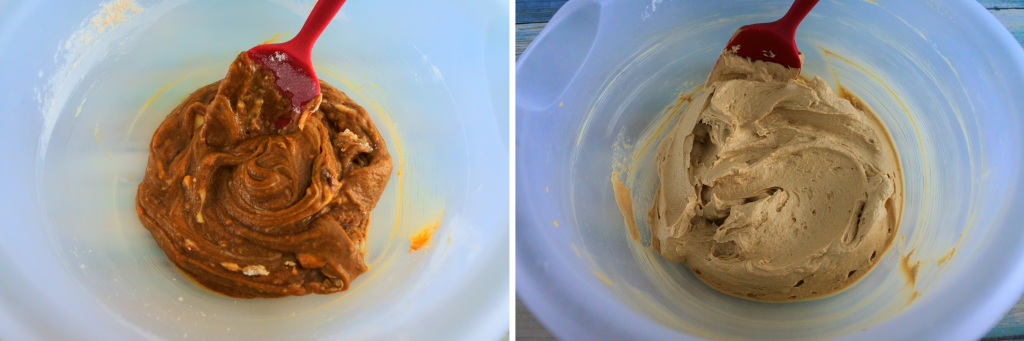
I used my spatula to mix the ingredients together and then switched over to my hand mixer for about 5-7 minutes to cream our butter and sugar.
So, why cream our butter and sugar?
Well the answer to that is simple: Volume. Notice how the color of the creamed butter and sugar is much lighter and that the volume is also increased? What we’ve done here is infused pockets of air within our fat and sugar. This plays a big role in the texture and bake of our cookie.
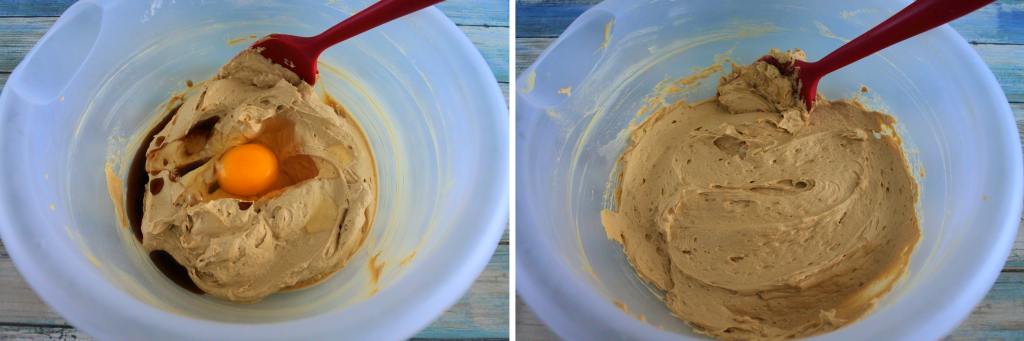
Once our butter and sugar is sufficiently creamed to the point of being light and fluffy, we’re going to add and mix in a cold egg (the coldness helps stabilize the butter a bit) along with our vanilla extract.
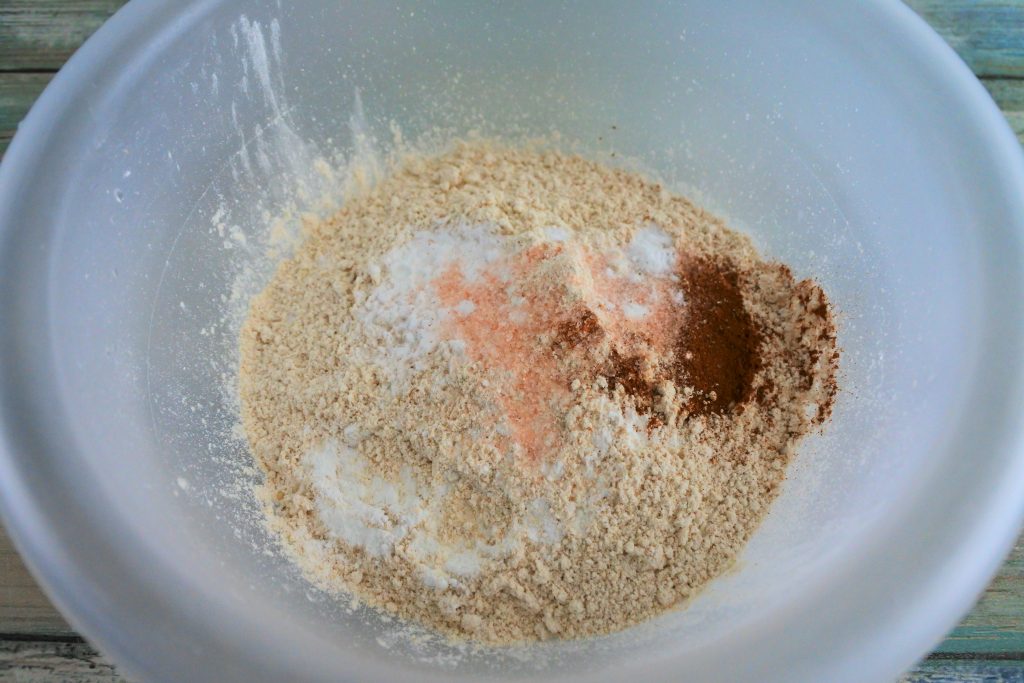
Now for our dry ingredients! Into a bowl we’ll sift our whole wheat pastry flour, along with the baking powder, baking soda, salt, and cinnamon.
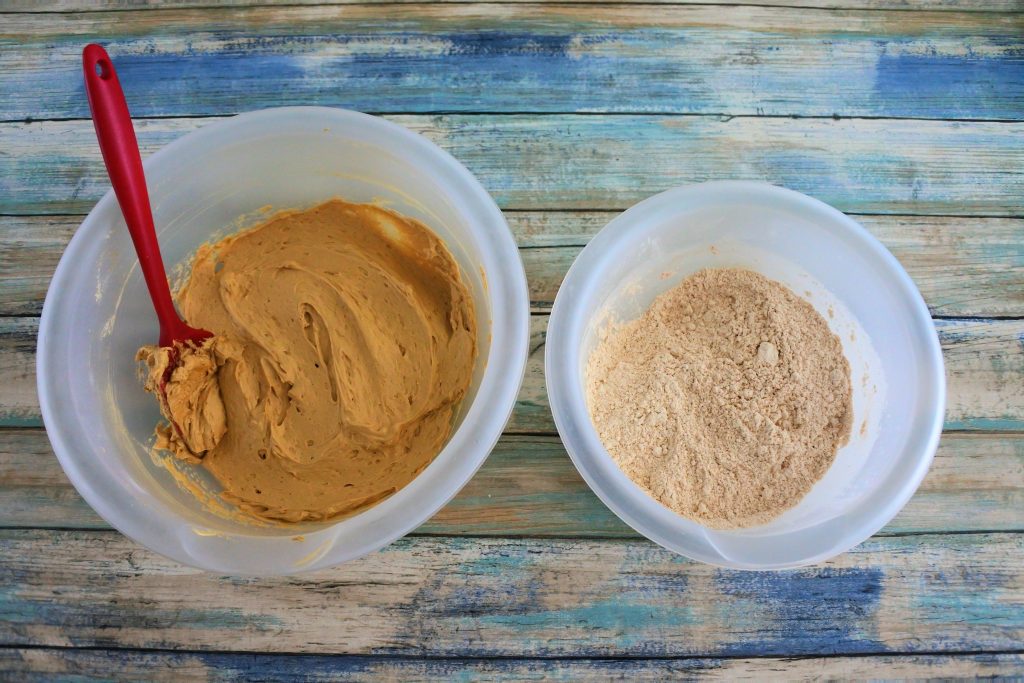
Our wet and dry ingredients are now ready which means that our dough is on the homestretch!
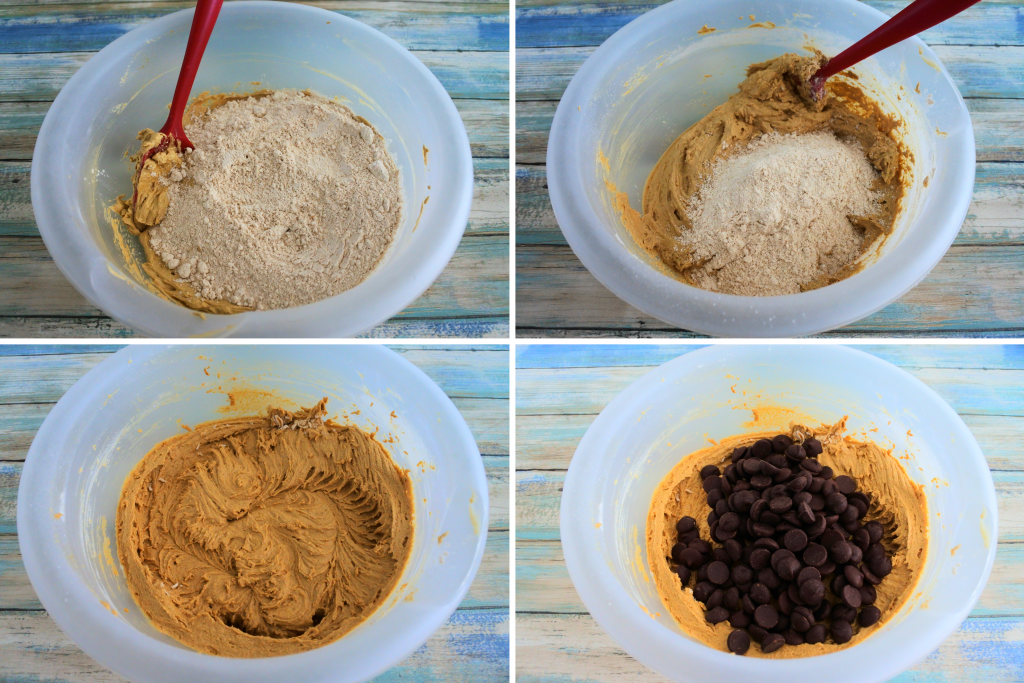
Add in half of the flour mixture to the creamed butter/sugar/egg and mix it in completely before adding the other half. I use my spatula to incorporate the flour before using my hand mixer to combine everything, in doing so I avoid having the mixer kick up a plume of flour that covers and settles on EVERYTHING in my kitchen including myself… I’m sure we’ve all been there 😅
Once our dough is combined, the best part comes next; adding in our chocolate chips.
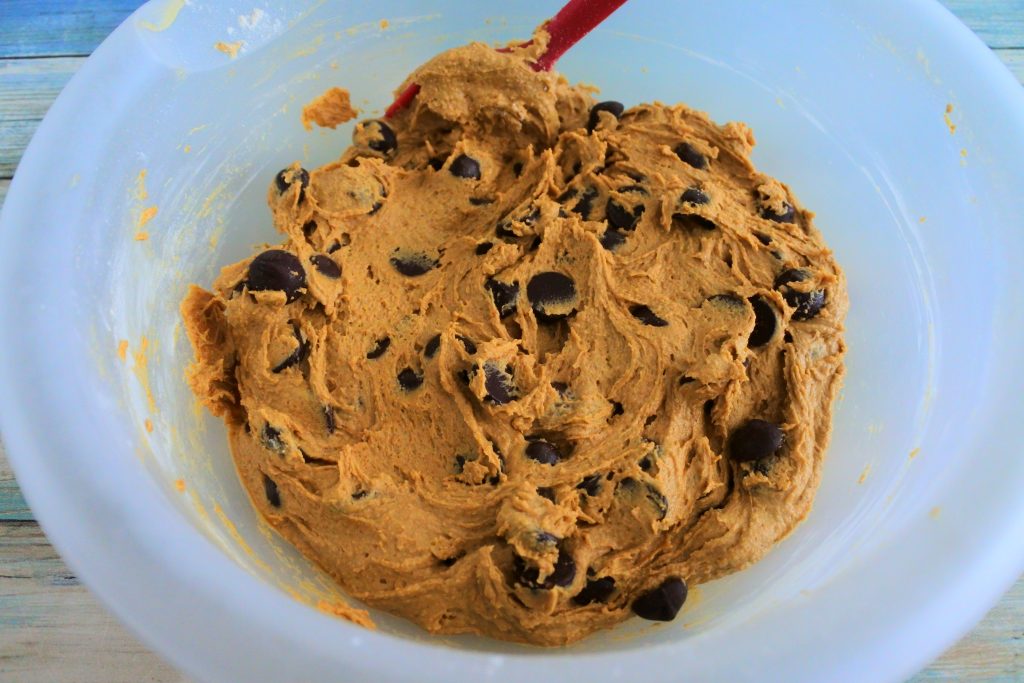
Using your spatula, fold your chocolate into the batter, spreading them out as evenly as possible.
Your dough at this point should resembled a traditional cookie dough that’s just slightly on the softer side. It shouldn’t be wet and should look like the image above. If it’s too wet, (this can be as a result of numerous factors including using a larger egg, using a different kind of sugar, adding that extra splash of vanilla…we all do it! or even the brand of flour you use) then add more flour one leveled tbsp at a time until you get a desired consistency. A dough that is too wet will result in a cookie that melts and spreads even after being chilled. Speaking of which…
Our dough is done! Now comes the…long part; resting our dough. I recommend a minimum of 12 hours or as much as 24 hours.
Wait…I have to rest my dough overnight?! WHY?!
I know, I know, this might not be the most optimal step, especially if you’re craving a cookie right now. But hear me out. Resting (also known as ripening) our dough overnight is a crucial step to this recipe and it makes for an amazing cookie. It’s worth it, trust me.
As for the why, well, there’s several reasons for resting our dough, but the main one is hydration. We’re using whole wheat flour which requires time for it to hydrate. More to that, our main wet ingredients are our butter and egg, both of which need time to work their way into our flour and properly hydrate it. Properly hydrated dough helps our cookies to spread, bake, set, and brown evenly.
The second reason is that we want our dough to set. This will help our cookies to bake up and have body. By chilling our dough it causes the butter to harden which prevents our cookies from going into the oven and immediately melting and spreading out into a thin puddle. By having the fat be cold, it means that it will take longer to melt, and as it melts all the other ingredients in our cookie will have time to play their part, and the end result will be a cookie that has thickness as well as texture.
The last reason is flavor development. As the dough sits, all the ingredients meld together and becomes one. That little touch of cinnamon you added? This is where it will blend into the vanilla and touch on the chocolate and make friends with the sugar and butter. We want to give our ingredients the time to become friends, only good things happen when they all get the chance to play nice 😉
Portion and Bake your cookies:
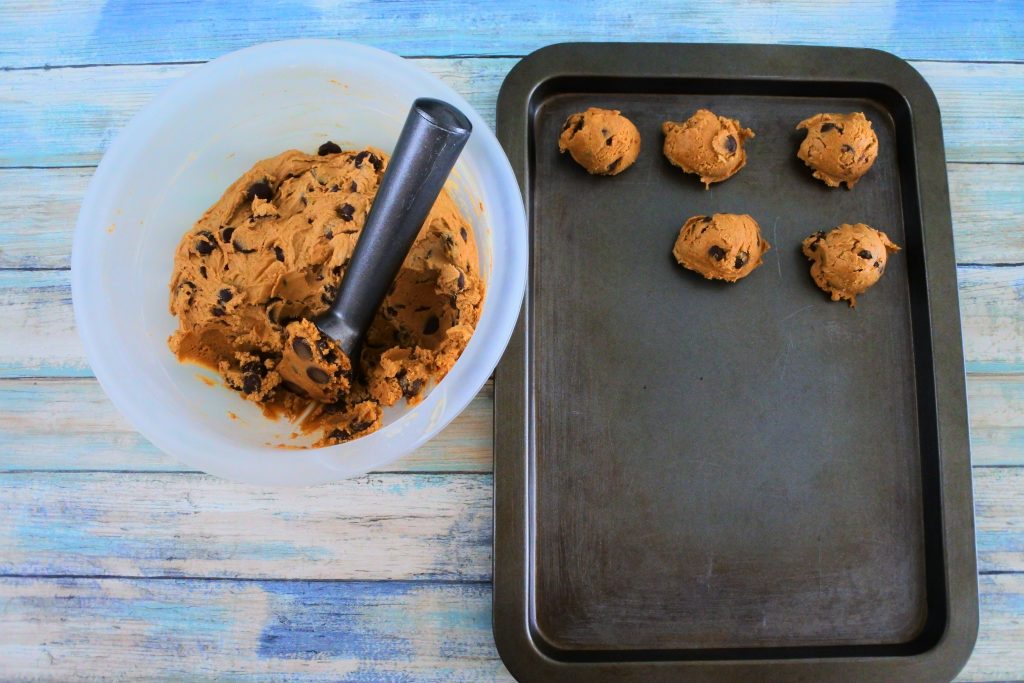
So, it’s now the next day and our dough has been sitting for at least 12 hours in the fridge. Using a scooper or two spoons, portion your dough out into 18 equal portions. It’s (in my view) the perfect size for a serving, as well as for the cookie to have enough real estate to do magical textural things.
If your dough is too hard to scoop, let it sit at room temperature for about 10 minutes and then try again. Don’t let it get too soft though.
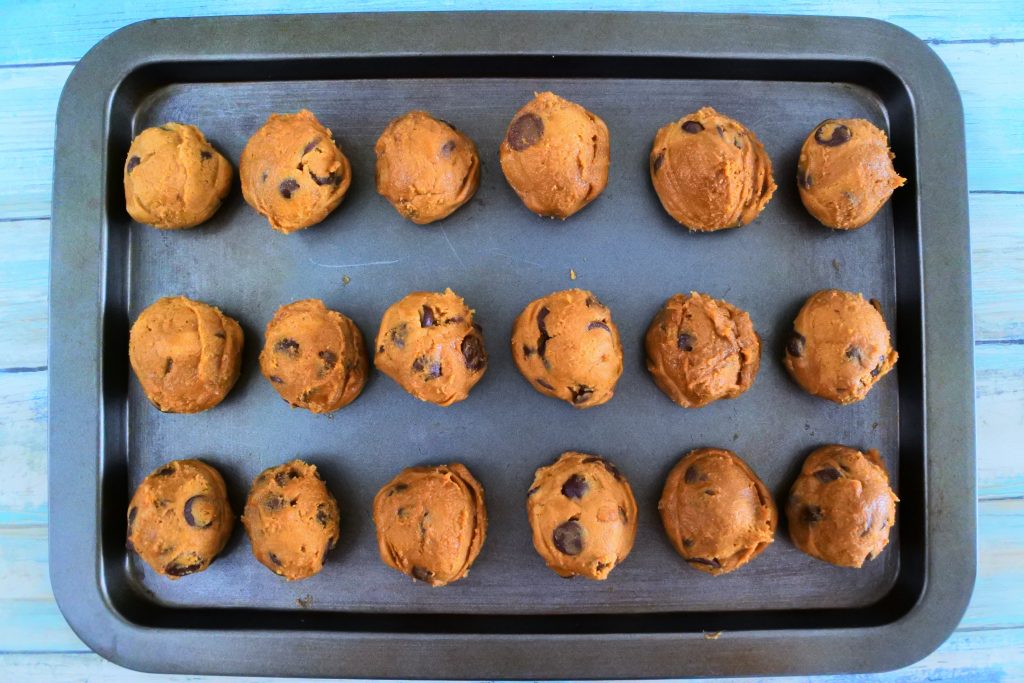
With your dough portioned out, pop them back into the fridge or even into the freezer if the tray fits.
With your dough chilling, preheat your oven to 375 F. Once your oven comes to temperature, place your cookie dough portions onto your parchment-lined cookie sheet (parchment helps cookies to bake evenly by keeping the bottoms from browning too quickly, this is especially true when baking on darker trays. Plus it saves your the hassle of having to grease the tray or having your cookie be stuck!) and pop them into the oven to bake for 10-12 minutes.
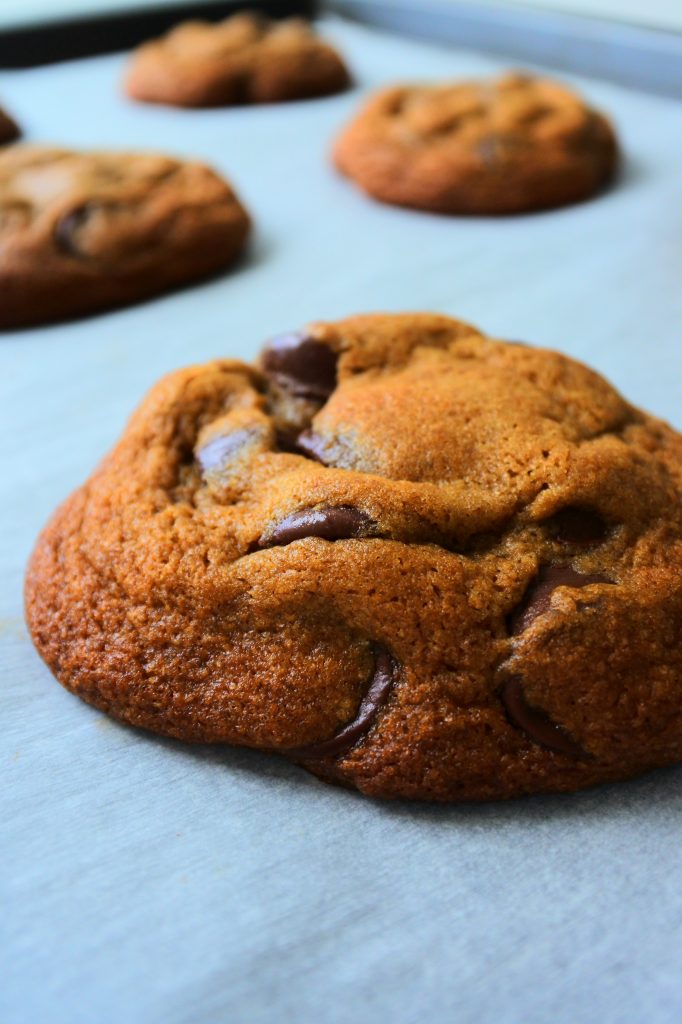
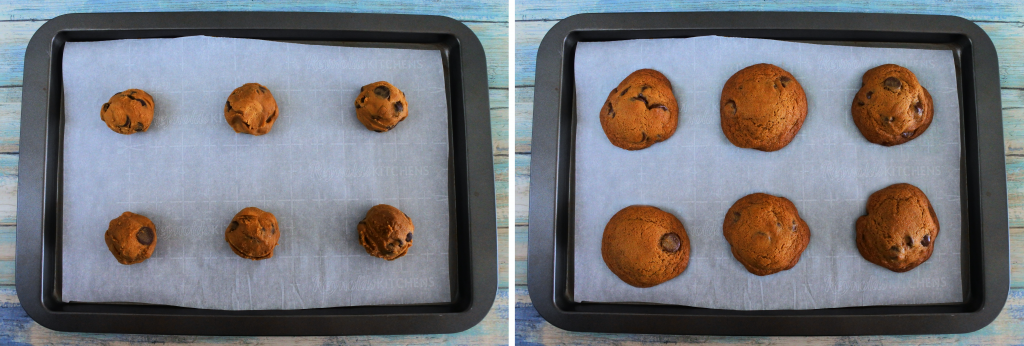
Right out the oven (like in the image above right) they will have a bit of height to them (especially in the middle) but as they cool, that height will dissipate and your cookie will sink in/flatten a bit. This is totally normal and it’s also how you get a wonderfully textured surface with craggy crackling! Speaking of which…
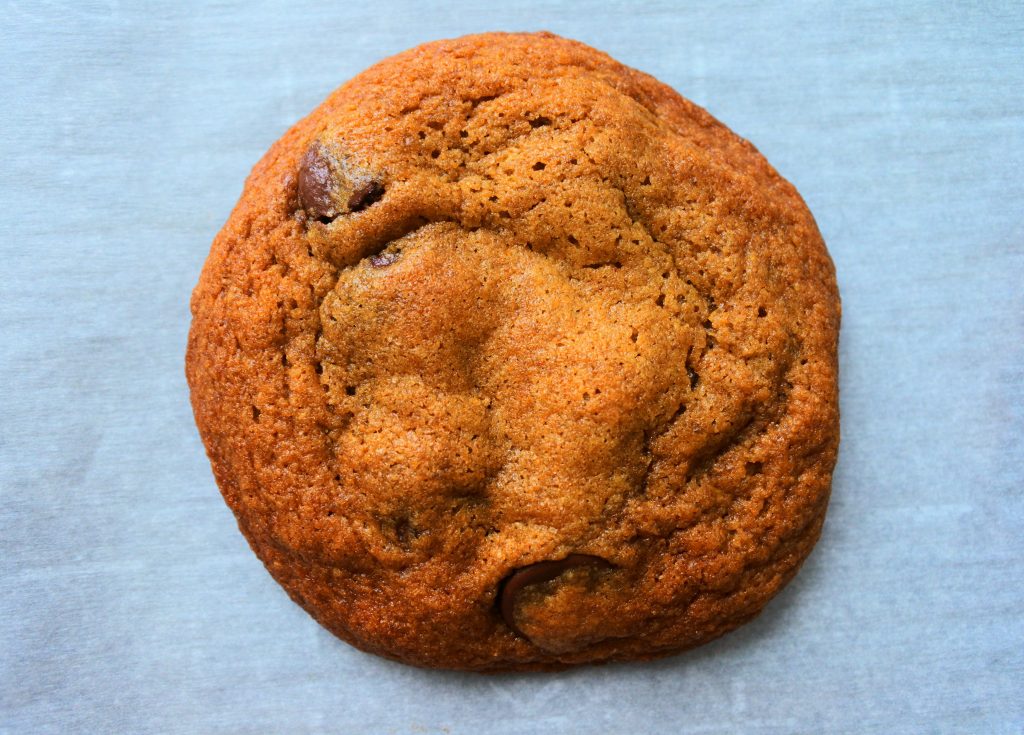
Look at the even browning and perfect spread. And the textured surface! You can almost see the radiating areas from the just-set middle, the chewy ring surrounding the center, and the crispy edges. Heaven! Also, let’s not forget those pockets of melty chocolate splattered throughout 🤤🤤🤤
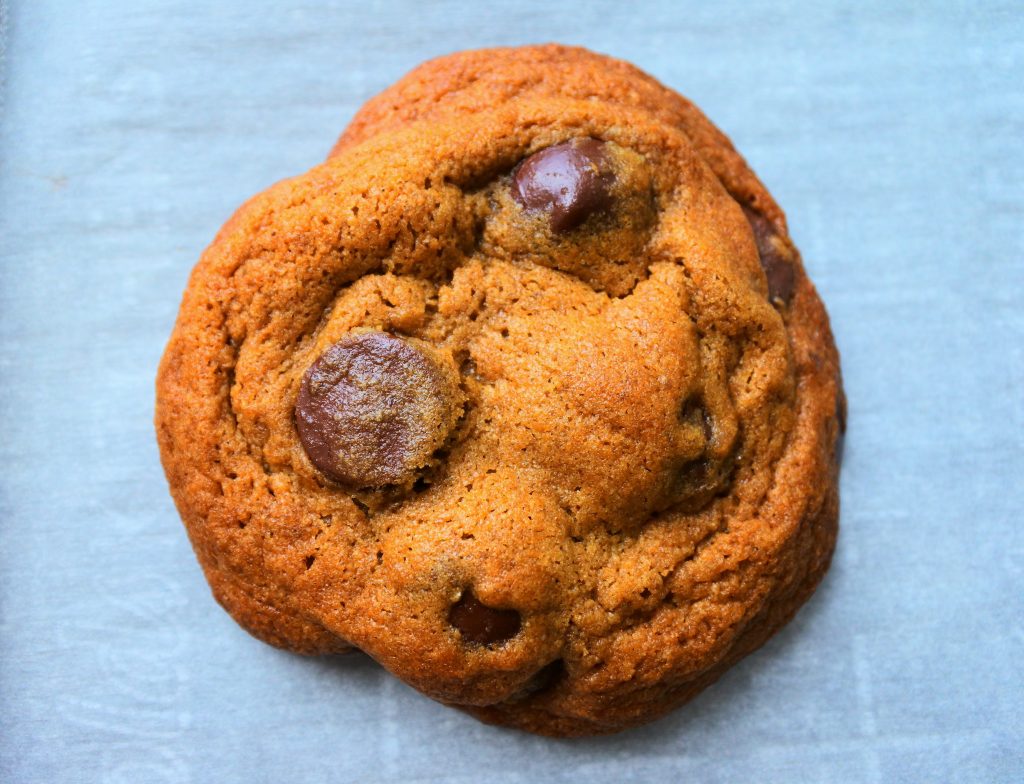
What makes it even more special is that each cookie is unique and different. Cookie close ups are the best, aren’t they?

Honestly, nothing beats a well-made cookie, and this recipe hits all the right spots.
I’d really love for you to give it a try and you’ll see for yourself just how good these are. And if you do give them a go, let us know how they turned out! Leave a comment below or reach out to us on social media (@kitrusycleaneat and #kitrusy). Don’t forget to snap and show off your pics by tagging us so we can celebrate your cookie-tastic creations together! 

Classic Chocolate Chip Cookies (100% Whole Wheat)
Ingredients
- 1 cup raw cane sugar (finely blended)
- 2 tbsp molasses
- 1/2 cup salted butter
- 1 tsp vanilla extract
- 1 large egg
- 1¼ cup whole wheat pastry flour (packed and leveled off)
- 1/2 tsp baking soda
- 1/2 tsp baking powder
- 1/4 tsp cinnamon powder
- 1/2 tsp Himalayan salt
- 1 cup dark chocolate chips or chunks
Instructions
- Using a hand mixer, cream the finely blended raw cane sugar along with the butter and molasses until light and fluffy (about 5-7 minutes).
- Add in a cold egg and vanilla extract and mix until fully combined.
- In another bowl, combine the flour, salt, cinnamon powder, baking powder and baking soda together.
- Incorporate half of the flour mix ingredients into the creamed butter and sugar mix before adding the remaining half. Mix until no dry flour remains.* (See note)Your dough shouldn't be too wet and should look similar to a traditional cookie dough. If it's too wet, add in 2-3 leveled tbsp of flour.
- Add in the dark chocolate chips or chunks and stir to evenly distribute.
- Chill your dough in the refrigerator overnight or for up to 24 hours.
- Using a scoop, portion out 18 equal balls of cold dough onto a sheet pan or tray. Set your dough back into the refrigerator.
- Preheat oven to 375°F. Once the oven comes to temperature, place your cookies onto a parchment lined baking tray, keeping 2"-3" between each ball of dough and bake for 10-12 minutes until golden brown.
- Remove from the oven and cool for 10 minutes before enjoying.
Notes
- If you don't like cinnamon on the whole, you can omit it or sub in equal amount of espresso powder (for baking).
- * I recommend incorporating the flour in using a spatula first before using a hand mixer to minimize the flour from being flung everywhere (personal experience!)
- If the dough is too hard to portion after chilling, let it sit at room temperature for 10 minutes.
- Store any leftover cookies in an airtight container for up to three days at room temperature or up to a week in the fridge.
- The raw dough can be kept for up to four days in the fridge or it can be frozen for up to 9 months. To freeze your dough, portion out your cookies and place the dough rounds onto a lined baking sheet and set it into the freezer. Once frozen, remove them and place the frozen dough portions into a sealable freezer-safe bag or container. Remove as much air as you can from the bag before sealing it and place the bag into the freezer.
