Disclosure: This post may contain affiliate links.
This homemade gluten free pizza uses pantry staple ingredients. Even better, it requires no kneading or proofing and comes together in less than an hour from start to finish.
Gluten-Free Pizza Lovers Rejoice!
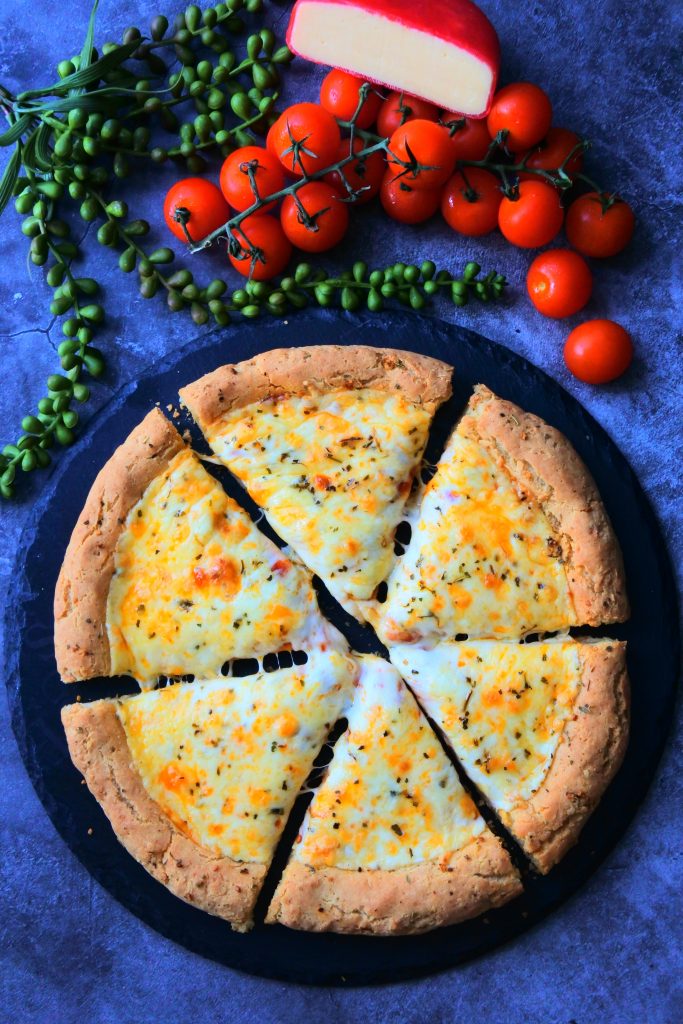
No matter what kind of pizza you enjoy, be it thin crust or a thicker, breadier crust, this dough is ideal for both. With a crisp underside that can support the sauce, cheese and toppings, it also has a bready layer above that that closely mimics a gluten wheat-based crust, and if you make it like I do, with a moat-like crust, you’ll have a great, fluffy, edge that is just begging to be dunked into garlic butter!
Gone are the days of gluten-free pizzas that are thin, tough, and dense or brittle and dry, gone are the days of pizzas that are gritty or grainy or have that weird almost almost slimy mouthfeel that you tend to get when you use certain ingredients like psyllium husk in an effort to mimic gluten’s chewy texture. Instead, we’re creating a pizza with a soft and moist crumb texture, a bready bite, and yeasted flavor that most of all uses simple pantry staple ingredients you’re sure to have on hand!
Speaking of which…
To Make This Gluten Free Pizza You’ll Need The Following:
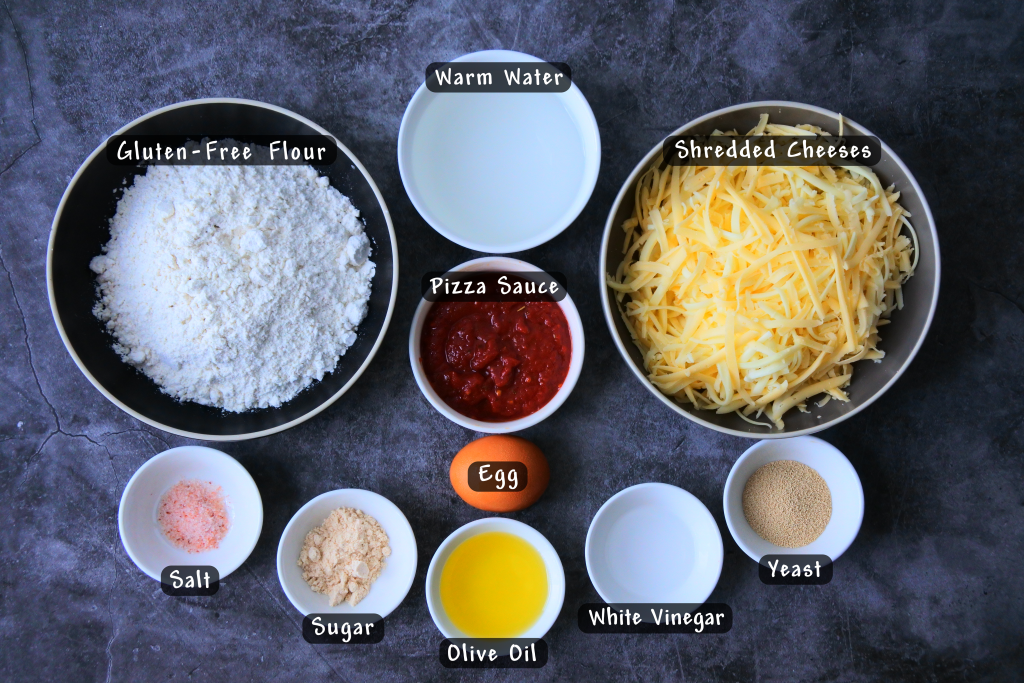
- Gluten-Free Flour: I’m using Bob’s Red Mill Gluten-Free 1-1 Baking Flour. This blend contains sweet white rice flour, brown rice flour, potato starch, sorghum flour, tapioca flour and a touch of xanthan gum
- Salt: I’m using pink Himalayan salt but you can also use a sea salt.
- Warm Water: You want your water to be between 105F-110F so that our yeast can be encouraged to bloom.
- Yeast: I’m using active dry yeast which needs to be bloomed in water but you can also use instant yeast if preferred.
- Sugar: I’m using finely blended raw cane sugar. The sugar plays the role of not only helping to feed our yeast but it also makes our dough retain its moisture.
- Egg: The egg is a key element that absolutely cannot be omitted. The egg takes the role of replacing the gluten in part by acting as a binder that helps our dough to bake and stabilize, it also enriches our dough and helps it to rise giving it the much sought after texture.
- Olive Oil: The oil helps our dough retain moisture which makes it nice and soft but it also helps our crust to have that enviously crisp crust on the underside and exposed edge.
- Vinegar: A small touch of vinegar helps our dough to rise and helps it to retain a moist crumb and airy texture. Note: Don’t alter the amount stated in the recipe as too much vinegar changes the pH of the dough and kills the yeast having the opposite effect.
- Pizza Sauce: I’m using my homemade pizza sauce. Since this is a gluten-free crust, it doesn’t have the same protein strands that regular pizza does which means it won’t stand up well to sauce that is too watery so ensure that your pizza sauce is thicker and on the more concentrated side for the best results.
- Shredded Cheese: You can use any of your favorite shredded block cheeses. The most commonly used cheese is mozzarella. A great tip is to use a combination of cheeses for the best flavor results. My personal favorite combination is mozzarella, provolone, gouda and pecorino Romano. If you really want to amp the flavor up, use either a smoked provolone or gouda!
- Optional Spices: Since I’m making a simple cheese pizza, I’m using a pinch of dried oregano and dried basil that will be sprinkled over our cheese to add great flavor. If you like using fresh basil, use it to top your pizza after you’ve baked it for the best flavor.
Now, Here’s How Hassle-Free This Dough Is To Make!
Before we even start, pop your pizza stone, baking sheet or a large baking tray turned upside into your oven and preheat your oven to 500F right away. If using a fan forced oven, we’ll be using the middle rack, but if using a conventional oven, opt to use the lower rack.
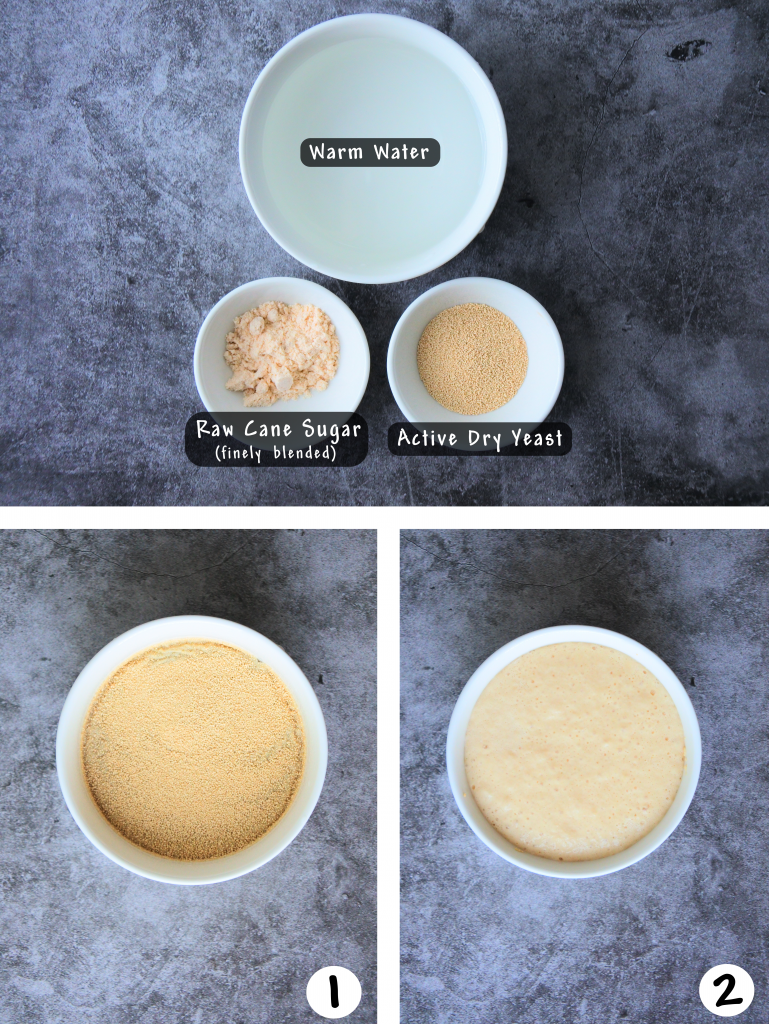
1 & 2: We’ll start by dissolving both the yeast and sugar in the warm water and letting it rest and bloom for about 5-10 minutes.
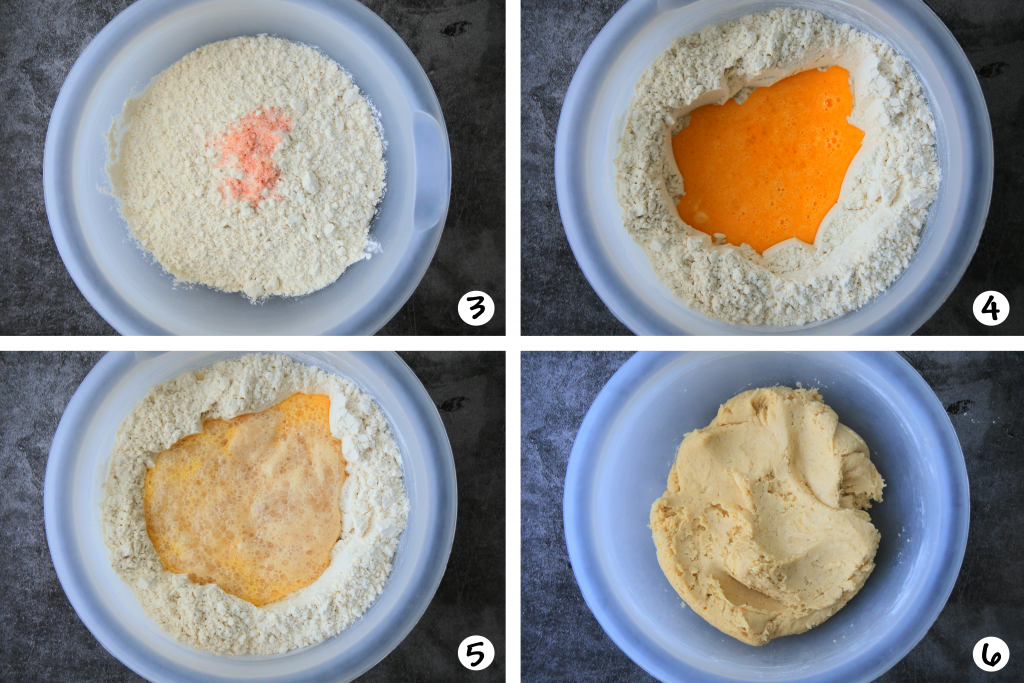
3: While our yeast blooms, we’ll combine our flour and salt together.
4 & 5: Once the yeast is bloomed, we’ll add it , along with our beaten egg, olive oil, and vinegar to a well made in our flour.
6: Then, we’ll mix it all together for a few minutes until a dough forms and cleans the sides of the bowl.

7 & 8: With the dough formed, turn it out onto a piece of parchment paper (not wax paper), and using your hands (I highly recommend you lightly oil your hands to make shaping easier), press and form the dough into a 12″ circle working from the middle outwards, leaving a raised edge for the crust. Keep in mind since there is no gluten this dough doesn’t have any stretch to it so you can’t “slap” it like you would traditional pizza dough.
Note: This dough can make one thicker pizza like above, or two thin crust pizzas.

9: With your crust shaped, use the tines of a fork to “dock” the bottom of the crust, this prevents the bottom from forming large puffy air pockets and keeps the bottom flat, by creating vents that will allow steam to escape instead of trapping them.
10, 11 & 12: Slide both the crust and parchment into the oven and onto your preheated pizza stone. Close the oven and reduce the heat to 450F and par-bake your crust for 8-10 minutes.
The parchment will brown quite a bit but that’s normal. Once parbaked, slide the parchment and crust out of the oven and onto a tray or baking sheet let it rest for 2-3 minutes. (Don’t forget to close the oven door and let the oven hold it’s temp at 450F).

13 & 14: These two steps are optional but highly recommended – I’m making a garlic butter to brush on the crust to give a phenomenal buttery flavor and to have some leftover to dip my crust into when I enjoy the pizza. To make it simply melt some salted butter and add to it dried oregano, Italian seasoning and dehydrated garlic and mix everything together.
The reason I’m using dehydrated garlic over fresh garlic is that fresh garlic would burn since we’re going to bake our pizza at a higher temperature but the dehydrated garlic doesn’t.
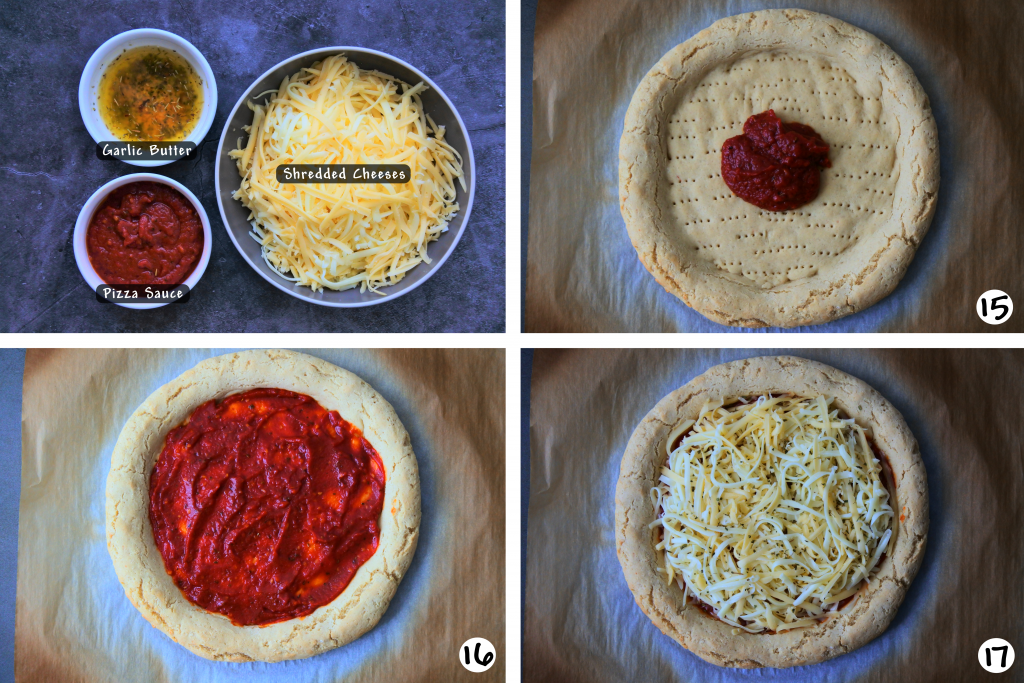
Now our crust is ready to be topped. We’ll gather our crust, cheese and sauce and any additional toppings you want to use, including the garlic butter.
15, 16 & 17: Add your sauce to the crust and spread it out into an even layer. Then top with cheese and place your selected toppings. For an extra kick, I’m sprinkling a touch of dried basil and oregano over the top of the cheese.
Let’s Talk About Toppings:
Now that we’ve come this far, one thing you don’t want to do it overload your pizza with cheese or toppings.
Aa a general rule of thumb, 12″ pizza should have:
- 2.5-4oz. sauce: 2.5oz. for a single thicker crust pizza, and 4 oz. divided into two for two thinner crust pizzas.
- 6-8 oz. of cheese: 6oz. if using a high moisture cheese like mozzarella, or 8 oz. if you’re mixing blends.
- No more than 5 toppings: the amount of each topping depends on the weight or oil/moisture content of it, but as a general rule of thumb, don’t overload your pizza, and be sure to place your toppings sparingly in the middle so that it won’t be weighed down and can bake properly.
If you’re using other toppings, ensure any meat is precooked or cured/is edible without needing to be cooked. Also, while most veggie toppings can be put on raw (such as onions, green peppers, mushrooms, black olives, etc.) some hardier ones will need to be cooked to make them either palatable (like broccoli) or to remove excess water that will seep into your crust and make things soggy (like eggplant).
Here’s a question for you guys: do you like to put your toppings under or over the cheese? Let us know in the comment section below.

18: With our pizza sauced and topped. We’ll brush the crust edge with the garlic butter and then slide it off the parchment and into the oven, directly onto the pizza stone. Since it’s parbaked it should slide right off without issue, no cornmeal required.
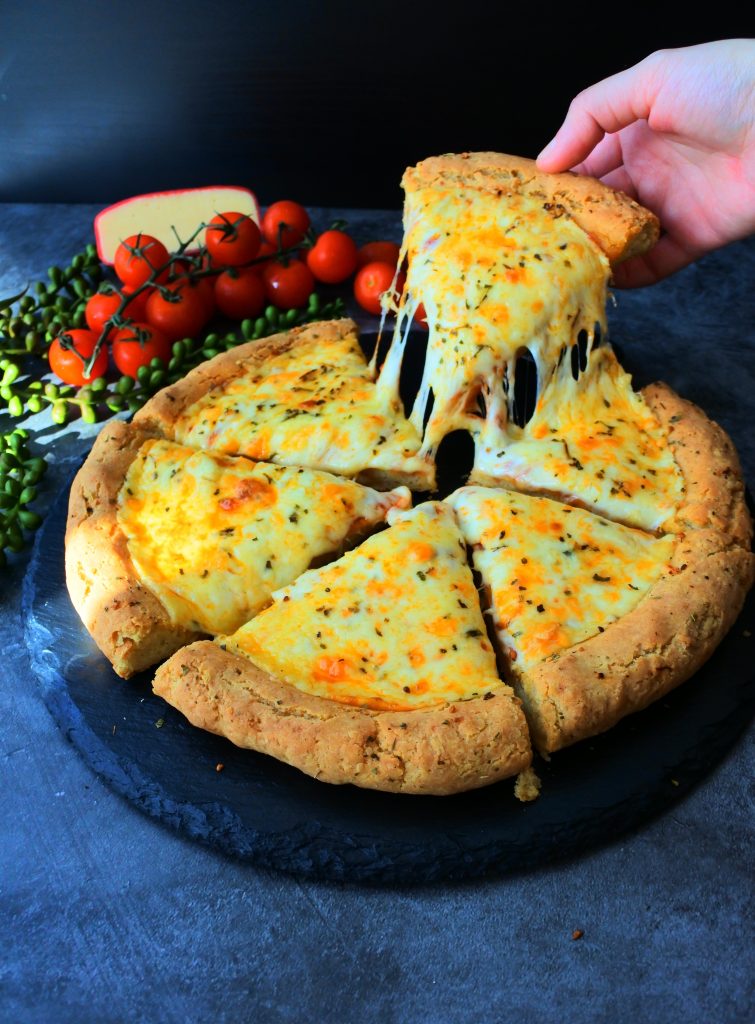
19 & 20: Bake your pizza one final time at 450F for a further 8-10 minutes until the cheese is bubbling and just starting to brown.
Once done, slide your pizza out onto a cooling rack or carefully remove the pizza stone from the oven and set it onto your stovetop. You don’t want to slide the pizza directly onto a plate or tray right away because the heat from it will cause steam to form and if the pizza is resting on a flat surface that is a cooler temp or has no airflow under it, steam will be trapped and create moisture that will make your crust soggy.
Let your pizza rest for 5-10 minutes before you cut into it to allow the cheese and sauce to cool and set. Cutting into it too early might cause your cheese and toppings to slough off the crust and besides it will be far too hot to eat.

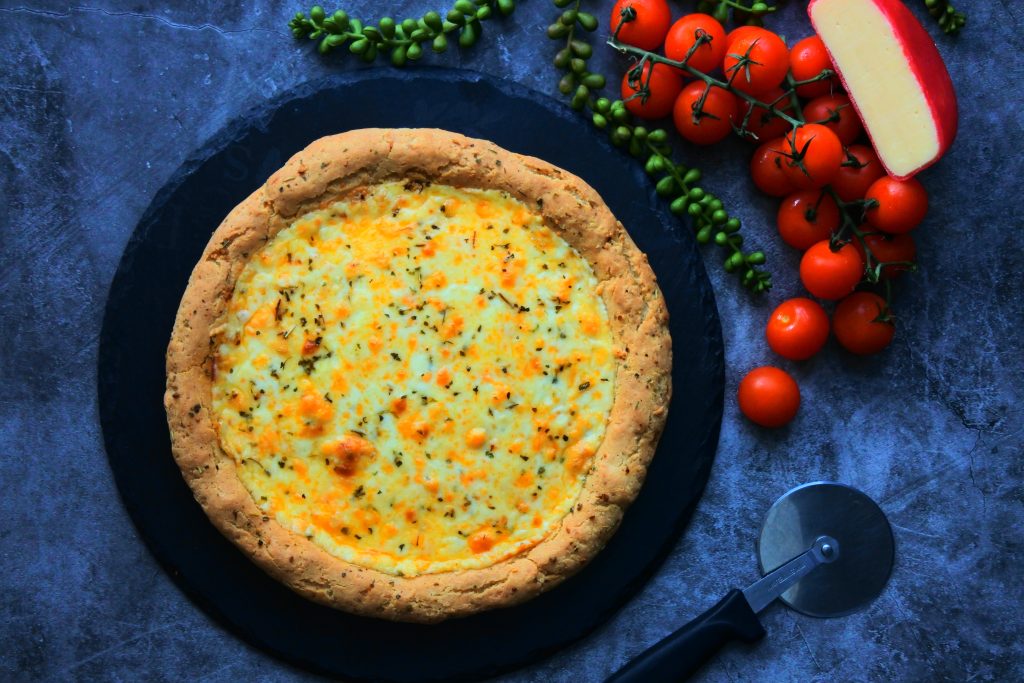
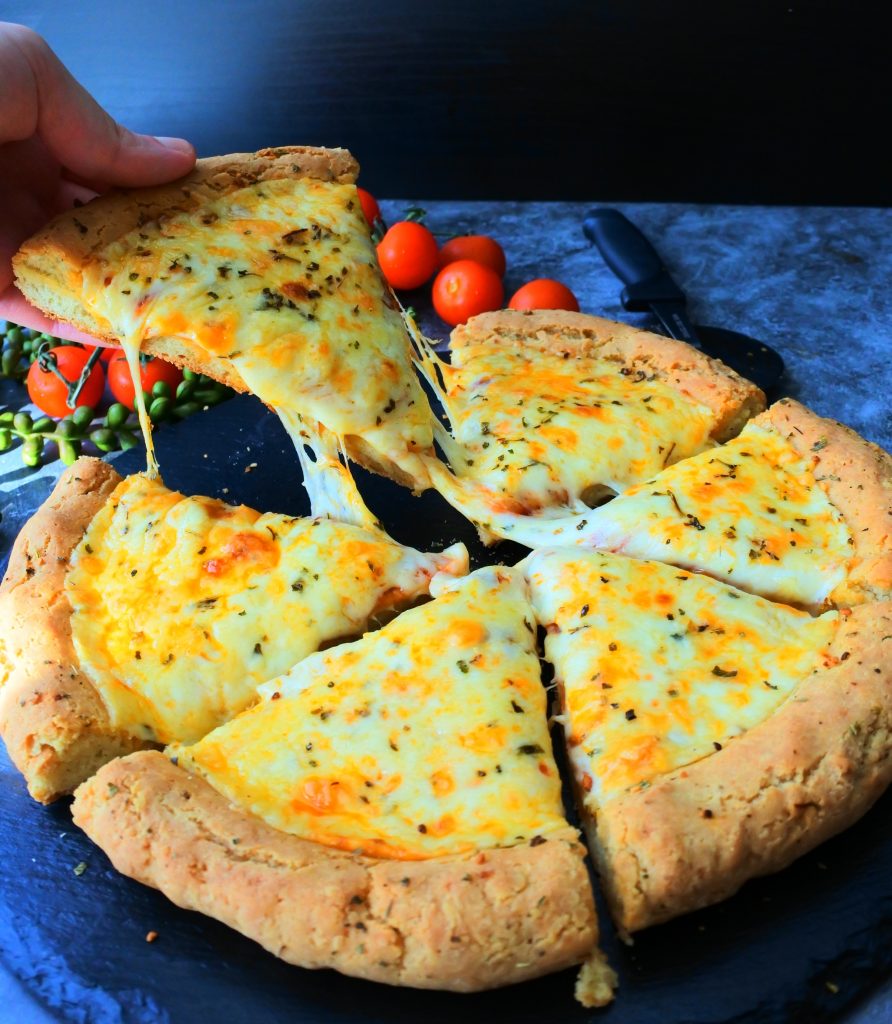
Slice your pizza into as many portions as you like. I’ve cut mine into 6 generous slices. One 12″ pizza will feed 3-4 people.

Can This Pizza Be Reheated?
This pizza does hold up great to being reheated the next day! From the fridge you can either rebake it at 400F for 4-7 minutes in a preheated oven, toaster oven, or even an airfryer.
Summarized Tips and Tricks for Success:
- Use a pizza stone and be sure you heat your oven with the stone inside it. If you don’t have a pizza stone a great alternative is a baking sheet or even a baking tray turned upside down.
- Ensure your pizza sauce is on the thicker side to avoid the crust from getting too soggy.
- When shaping your crust, lightly oil your hands to make it easier to shape the dough.
- Use a blend of cheeses instead of just one to really kick your flavor up.
- Don’t overload your pizza with cheese or toppings and be sure to place your toppings sparingly in the middle so that it won’t be weighed down and can bake properly.
- Optional but highly recommended: brush your par-baked crust edge with garlic butter.
- Once your pizza is baked either remove it from the oven and onto a cooling rack to allow for airflow under it to prevent the crust from becoming soggy, or, my preferred method – remove the entire baking stone from the oven and set it on top of your stovetop. This keeps your pizza warm without making your crust soggy, plus it makes cutting easier.
- Let your pizza cool for 5-10 minutes before cutting it.
And there you have it, a simple and easy homemade gluten-free pizza that honestly rivals most of the ones you will find in stores or restaurants. It’s bready, light, fluffy, has a great crust and moist crumb texture.

Kitrusy’s Gluten Free Pizza
Equipment
- Pizza Stone or baking sheet
Ingredients
- ¾ cup water between 105-110 degrees F
- ½ tbsp raw cane sugar finely blended
- 2¼ tsp active dry yeast 1 packet
- 2 cups Gluten Free 1-to-1 Baking Flour
- ½ tsp Himalayan salt
- 1 large egg
- 1 tbsp olive oil or melted butter
- 1 tsp distilled white vinegar
- ⅓ cup pizza sauce
- 8 oz shredded pizza cheese blend shredded - See notes*
- ½ tsp dried basil optional
- ½ tsp Dried Oregano optional
Optional Garlic butter:
- 1 tbsp salted butter
- ¼ tsp dried garlic
- ⅛ tsp Dried Oregano
- ⅛ tsp Italian seasoning
Instructions
- Preheat: Set your pizza stone on the middle rack of your oven if using a convection (fan) oven or on the lowest rack if using a conventional oven, and preheat your oven to 500°F.
- Bloom your yeast: Dissolve your sugar in your warm water and then mix in the yeast, set it aside for 5-10 minutes to bloom.
- Make your dough: To a bowl, add your flour and salt and mix it together. In another bowl, whisk your egg until fully beaten. Make a well in your flour and add in your egg, olive oil, vinegar and bloomed yeast mixture and stir together until a soft dough forms. Mix your dough using a fork or spatula for 2 minutes until it cleans the sides of the bowl and there's no flour left.
- Shape your pizza crust: Place your dough onto a piece of parchment paper and using well oiled hands, gently push your dough outwards from the middle to form a 12" pizza round, being sure to leave a 1/2" thick rim for your crust.
- Par-Bake: Using a fork, gently dock/prick the base of your crust (but not the edge crust) and then slide the dough (parchment and all) onto the preheated pizza stone. Reduce the oven to 450°F and bake for 8-10 minutes.
- Add Sauce and Toppings: Remove your parbaked crust from the oven and allow it to cool for 2-3 minutes, then add your pizza sauce and top with cheese, spices (I'm using dried basil and oregano) and other toppings if using any. Optional: Brush the edge of the crust with garlic butter, made by melting the butter and adding in the dried garlic, oregano and Italian seasoning. If you like to dip your crust in garlic butter be sure to double the amount for the garlic butter.
- Bake: Slide your pizza directly onto the baking stone and bake a further 8-10 minutes until your cheese is bubbling and just starting to brown.
- Enjoy! Remove from the oven and allow to cook on a wire rack for 5-10 minutes before cutting and serving. Enjoy right away.
- Reheating Leftovers: If there are any leftovers, cool them to room temperature and store them in an airtight container in the fridge for up to 5 days. To reheat, I highly recommend using a toaster oven or even air fryer.
Notes
- I use this recipe to make one thicker crust 12" pizza that serves 3-4 people. You can opt to divide the dough into two and make two thinner crust pizzas.
- Ensure your pizza sauce is on the thicker side for the best results.
- While you can use whatever cheese you like, a great way to maximize on flavors is to combine cheeses. I've found a great combination to be 2 oz each of freshly grated mozzarella, gouda, provolone, and pecorino Romano.
- Don't overload your pizza with sauce, cheese and if using toppings, sparingly place them in the middle.
- Once baked, remove the pizza on the pizza stone and let it cool on the stovetop or slide it onto a cooling rack. Do not place it onto a cool flat surface as it will create steam under the bottom that will make your crust soggy.
