Disclosure: This post may contain affiliate links.
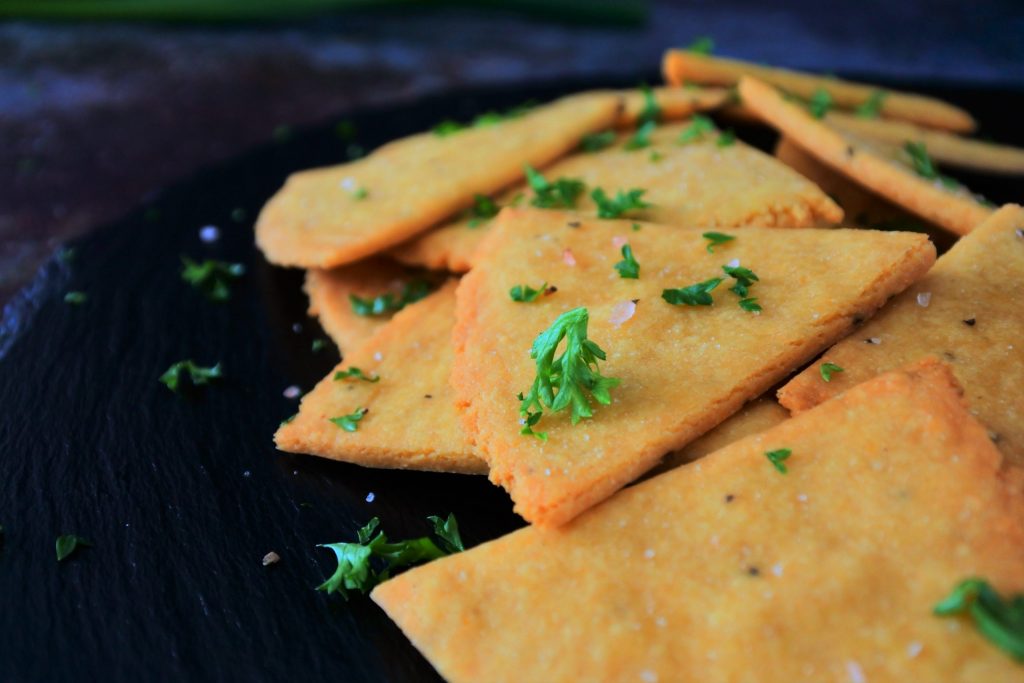
I’m ridiculously excited to share this recipe with you guys today for these insanely crisp, crunchy crackers that are wonderfully simple to make but will more than satisfy that crunchy, salty, savory snack craving.
💕 Here’s Why You’ll Love These Chickpea Crackers:
- They are easy to make and require only 8 ingredients
- They are thin, crispy and have a wonderful snap to them
- They are deliciously cheesy
- They are gluten-free, egg-free and clean eating
- They have 1g of protein per cracker!
- They pair amazingly with savory dips and make a great appetizer
These Crackers Are Made Using the Following Ingredients:
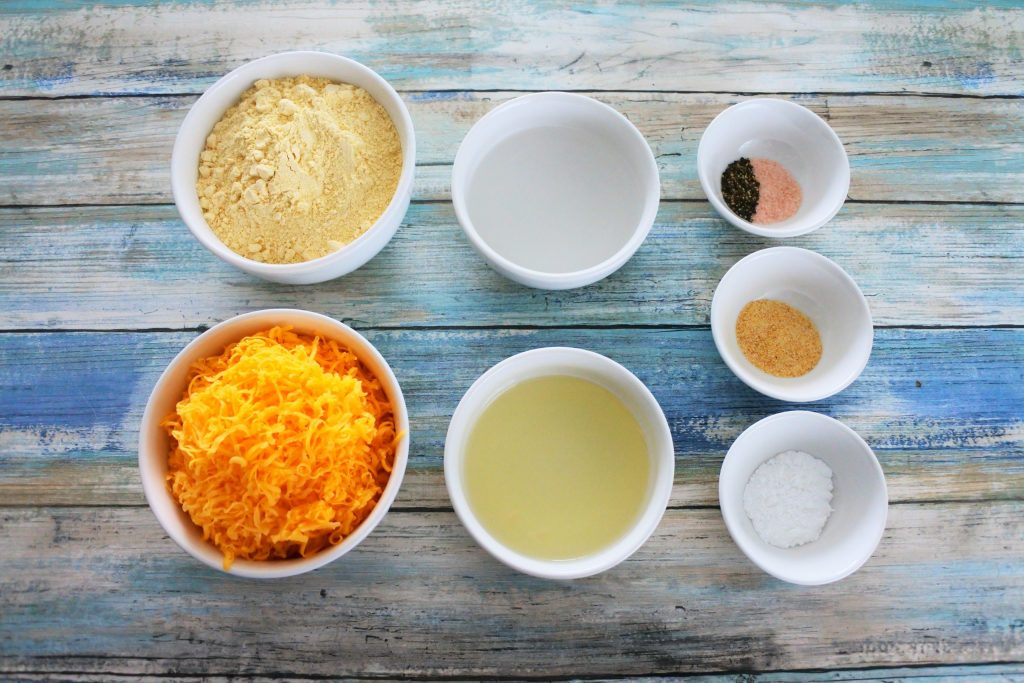
- Chickpea flour: also known as besan or garbanzo bean flour, it is the only flour we’ll need for our recipe.
- Cheese: For this recipe we’ll be using an off the block, freshly shredded cheddar cheese. You can also use freshly grated Parmesan if you like or a mixture of the two!
- Olive oil: You can use any neutral tasting, clean-eating oil. I’m using an extra light olive oil.
- Water: Room temperature or warm water works fine for this recipe.
- Salt: I’m using a pink Himalayan salt but sea salt can also be used.
- Spices: I’ve experimented with a range of spices from chipotle powder to a blend of Italian seasoning but the best combination really is simple ground black pepper and garlic powder.
- Baking powder: The baking powder helps give our cracker that perfectly light crisp snap. If you opt to exclude it, your resulting crackers will be harder.
The process for making our crackers may look intimidating but trust me when I tell you it’s insanely easy to do. Read on for a step by step guide with tips and tricks or skip ahead to the recipe card where you’ll find a quick video showing you how easy it is to make these!
So Let’s Get Right Into Making These Wonderful Little Crackers, Shall We?
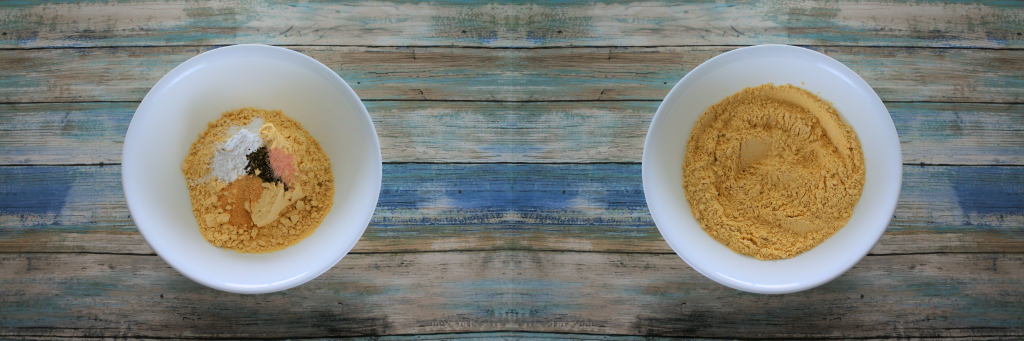
Step 1: Combine your chickpea flour, baking powder, salt, black pepper and garlic powder in a bowl until fully blended.
Step 2: Add in half of your water and oil and mix it into your flour until fully absorbed. Break up any larger clumps that have formed.
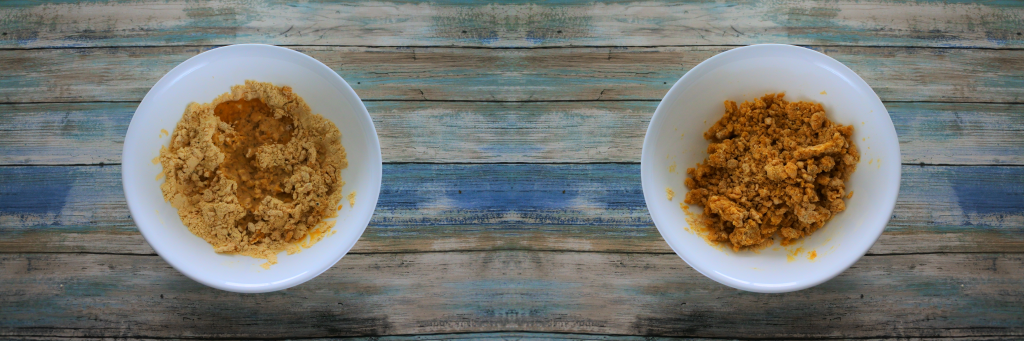
Step 3: Add in the remaining water and oil and mix until fully absorbed and your mixture is crumbly.
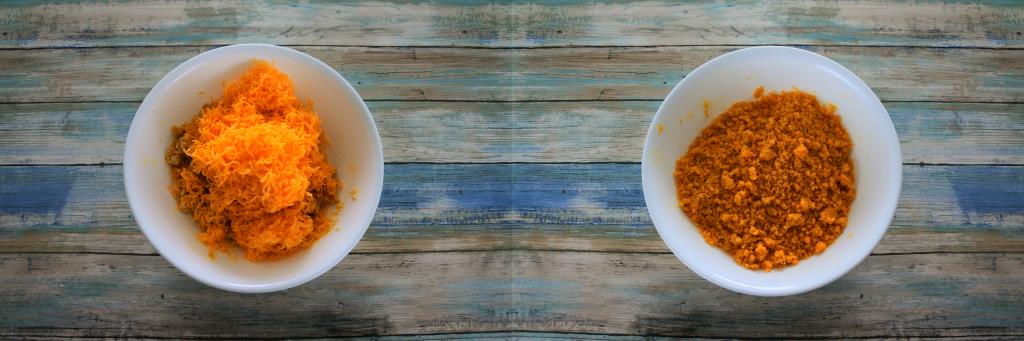
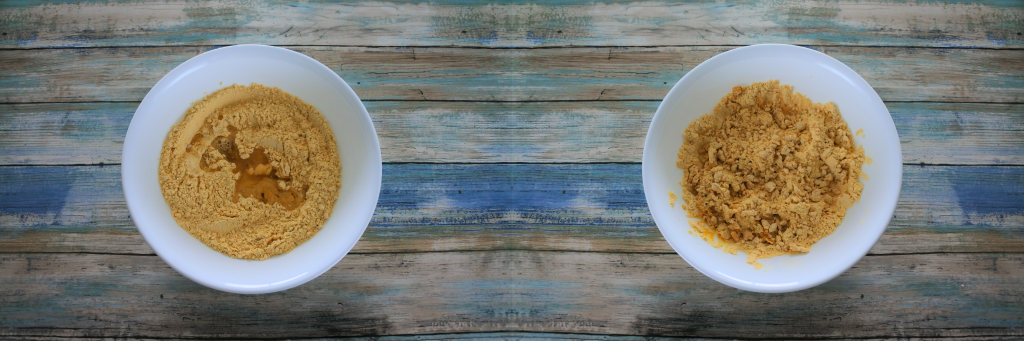
Step 4: Add in your cheese and work it into your flour mixture until it is fully blended. Honestly if you have a food processor (even a mini one) you can use it to make short work of this step.
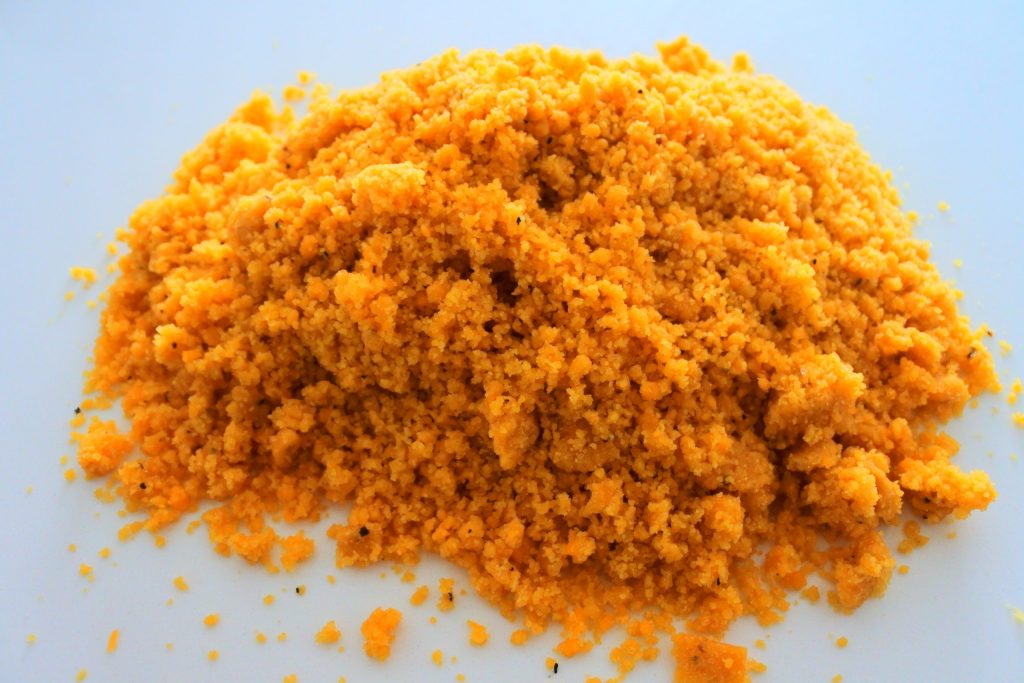
Your resulting mixture will look like the above. A coarse, crumbly mixture but it should be relatively moist.
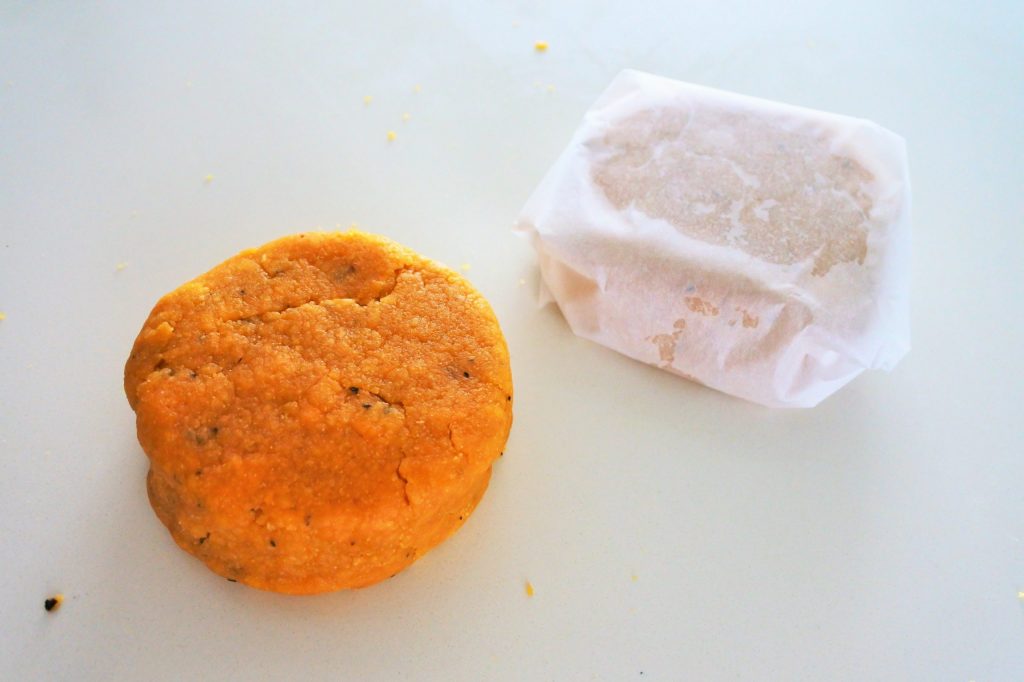
Step 5: Using your hands, squeeze and work your mixture together until a dough forms. Shape your dough into a ball or disc like above. If your dough is too crumbly and isn’t able to be formed, add a tablespoon of water to it and work it in until your dough can be shaped but isn’t wet, sticky, or tacky.
Wrap your shaped dough into parchment or plastic wrap and set it to chill in the fridge for 10-15 minutes. Note that I divided my dough into two for the purpose of showing two methods to rolling your dough out (see step below). There is no need to divide your dough unless you only want to make half a batch and reserve the other half to bake the next day.
(Step 6: Preheat your oven to 350F at this stage since all that’s left is to wait for the dough to chill and roll it and shape your crackers…speaking of which…)
Once your dough is chilled, roll it using one of two methods:
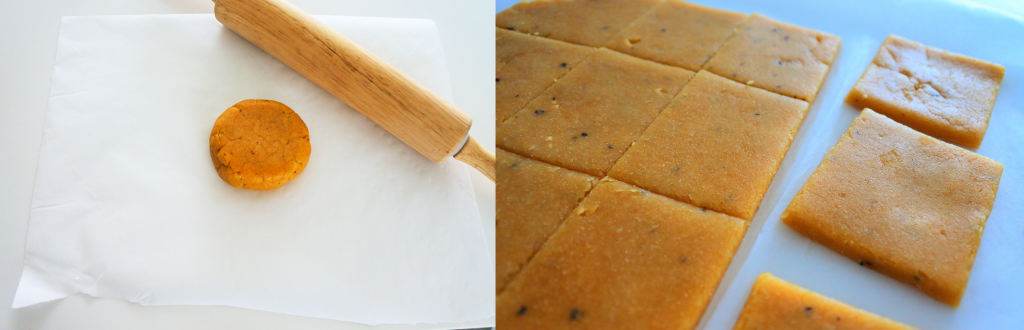
Step 7 – Method 1: Place your chilled dough onto a sheet of parchment and gently roll it out using a rolling pin. Your dough should not be crumbly but if the edges appear a bit crumbly as you roll it that is normal. If your dough is crumbling as you roll it or clumping and tearing onto your rolling pin it may be too dry. Add a tbsp more water and work it into your dough before trying to roll it out once more. The end result should be a smooth sheet of dough rolled to 1/16″ thickness. Using a sharp knife or pizza roller (my preferred tool) cut your dough into 24 squares or rectangles and either pick them up and place them onto a lightly oiled baking tray or slide the entire sheet of parchment paper onto a tray.
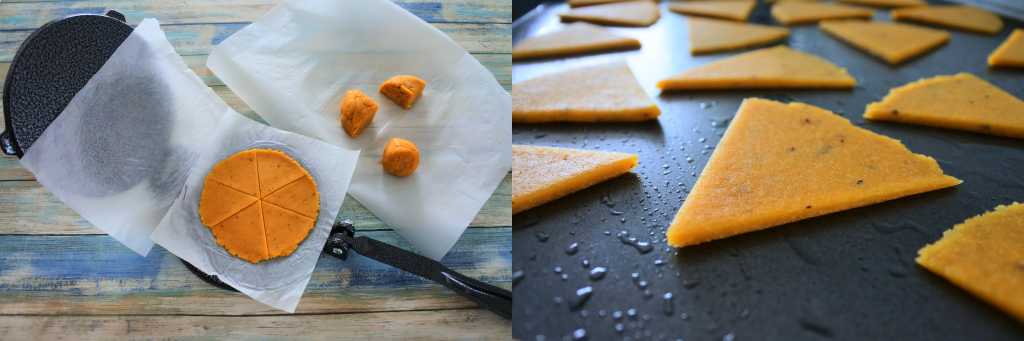
Step 7 – Method 2: This is honestly my go to method because of how easy it is. Divide your dough into 8 equal portions and quickly roll each into a ball (it doesn’t have to be perfect). Place a ball between two sheets of parchment paper and using a tortilla press or even a clean counter surface and the underside of a flat heavy skillet (like a cast iron pan) press your dough into flat 1/16″ rounds. Using a pizza cutter cut your round into 6 pieces and gently peel them off the parchment and place them onto a lightly oiled baking tray. Your dough should be able to be peeled off and held without crumbling or breaking.
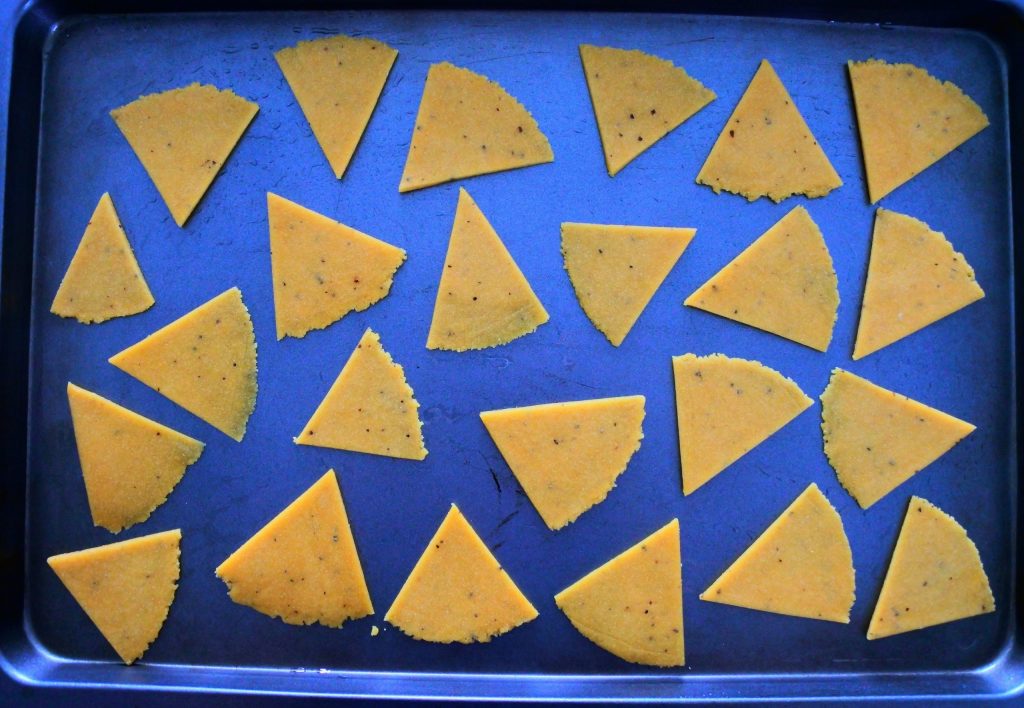
Step 8: Once you’ve placed all your pieces onto a lightly oiled baking tray, pop them into the oven for 12-15 minutes until their edges are nicely browned.
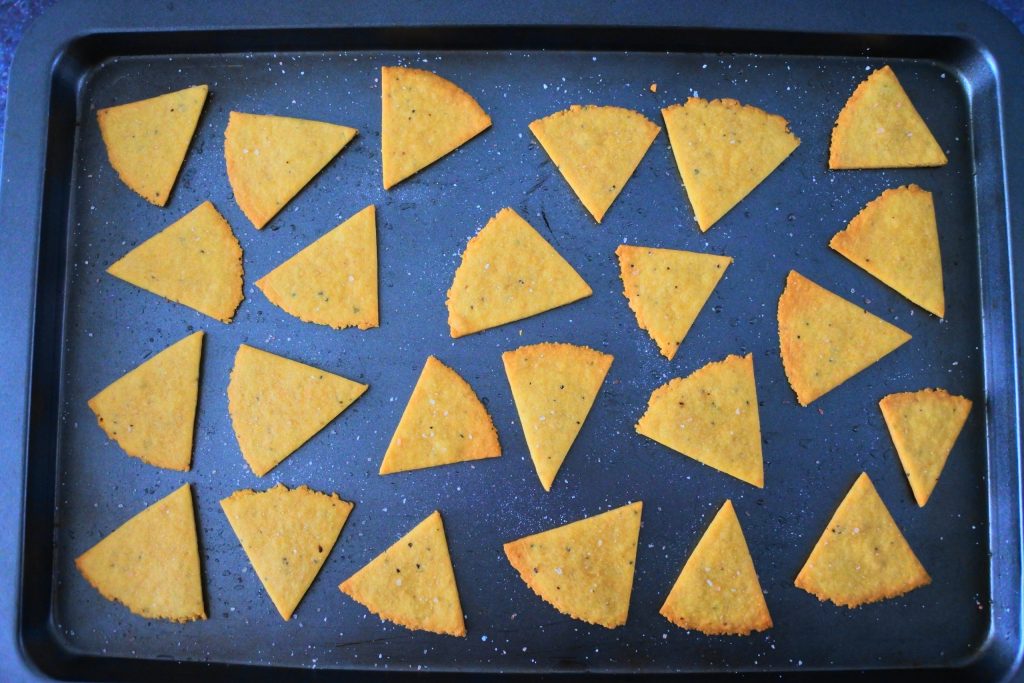
Once baked you can finish them with a crack of coarse salt or flaked salt. A great way of telling if they’re cooked is that they will have browned edges that will almost lift off of the pan. Let me show you what I mean…
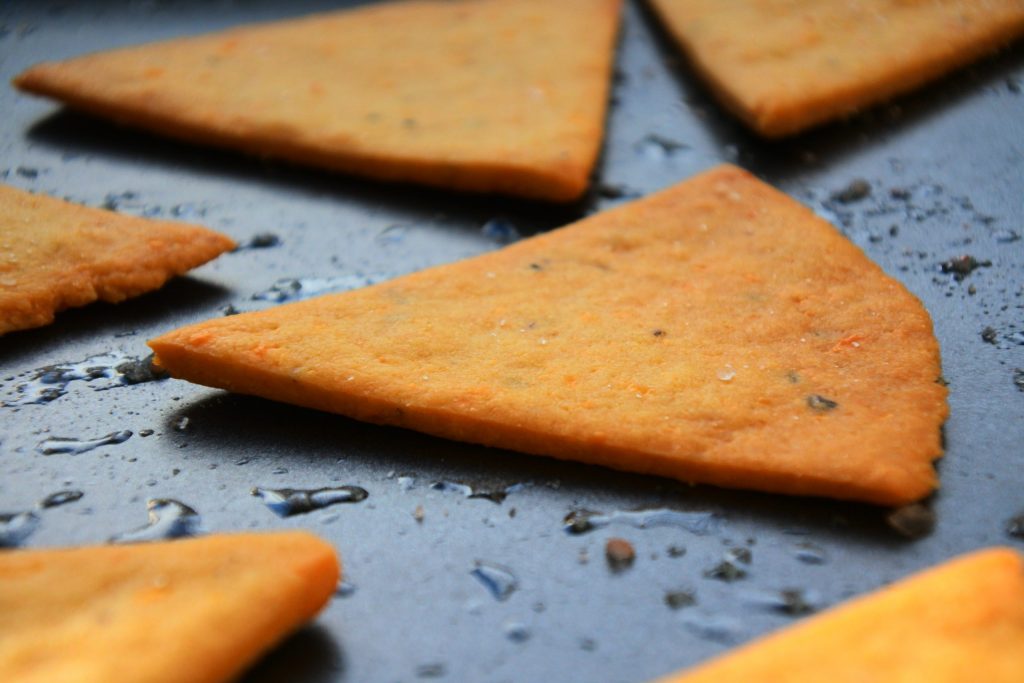
Do you see how the corners have lifted and are nicely browned? The undersides will also be wonderfully browned but be careful because they do burn easily so keep an eye on them from the 12 minute mark. If you take them out and cool then and you find that they are not as crisp as you’d like them to be you can always pop them back into the oven for a few more minutes until they have browned a bit more and crisp up to your desired preference.

Once cooled a bit you should be able to easily pick them up. They should be hard and crispy…go ahead, give them an oh-so-satisfying snap!
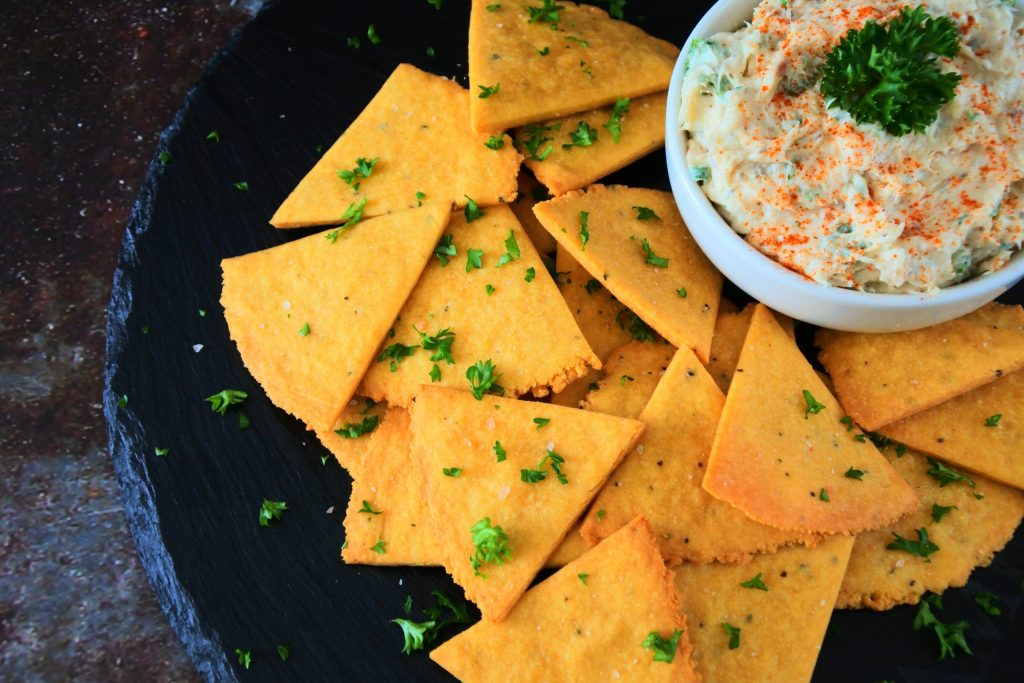
Enjoy them by themselves or with your favorite dips. I’ve paired mine with my incredibly indulgent Smoked Trout Dip which makes for a fantastic appetizer or snack!
These crackers are insanely addictive both in taste and texture and I really do hope you give them a try and more importantly that you enjoy them as much as we do! ❤️
Tell us in the comments down below: what shape do you prefer your crackers to be in? Square? Rectangle? Triangle? What dips do you pair your crackers with?
Cheesy Chickpea Crackers - Deliciously Addictive
Ingredients
- 1 cup Chickpea flour (aka Besan or Garbanzo bean flour)
- ½ tsp Himalayan salt
- ½ tsp ground black pepper
- ½ tsp Garlic Powder
- 1 tsp baking powder
- 3 tbsp extra light olive oil
- 4 tbsp water (+ / - 1-2 tbsp as needed)
- 1 cup cheddar cheese finely shredded off the block
Instructions
- In a large bowl or food processor add your chickpea flour along with your salt, pepper, garlic powder and baking powder and mix/blend until full combined.
- Add in half of your water and oil and mix until your chickpea flour absorbs all of it, being sure to break down larger clumps before adding in the rest of your oil and water and work it in until your mix develops a crumb texture.
- Sprinkle in your finely shredded cheese and work it into your chickpea mixture until fully incorporated. (A food processor does a great job for this part).
- Placed your processed crumb-textured mixture onto a clean work surface and work the mixture by squeezing it together until a dough forms. Your dough should be soft and workable but not sticky or tacky. If it is excessively crumbly or is having trouble forming together, add more water a tbsp at a time.
- Shape your dough into a ball or disc and wrap in parchment or plastic and chill for 15 minutes.
- Preheat your oven to 350°F
- Roll your dough out in one of two ways: 1. Rolling Pin Method: Place your dough onto a piece of parchment paper and roll it out into a rectangle that is about 1/16" thick using a rolling pin. Cut your dough into 24 pieces and either peel off your cracker pieces and place them onto a lightly oiled baking tray or slide the entire sheet of parchment onto a baking tray. Note: If your dough starts to crumble or sticks and tears off chunks onto your rolling pin then it is too dry. Add ½ tbsp more water at a time to the dough until the texture is smooth and workable. 2. Press Method: Divide your dough into 8 and roll each piece into a ball. Place your dough ball between two pieces of parchment paper and using either a tortilla press or even a flat, heavy plate or skillet, press your dough into a 1/16" thick round. Using a knife or pizza cutter, cut your flattened dough into six. Place each piece onto a lightly oiled baking tray. Repeat for remaining 7 balls of dough until you have a total of 48 cracker pieces. Your dough's texture is ideal when it can be peeled away from the parchment without crumbling or breaking or sticking to the paper or your hands. It should be soft and pliable but not tacky.
- Bake your crackers in your preheated oven for 12-15 minutes until they begin to brown around the edges. If they look too pale you can continue to bake them for 2-3 minutes more but do keep an eye on them to ensure that they don't burn.
- Optional: Add a sprinkle or crack of coarse or flaked salt over the tops of your crackers as they come out the oven (or even before you bake them if you prefer).Let your crackers cool completely on the tray and enjoy!
- Store any leftovers in an airtight container at room temperature for up to five days.
Video
Notes
- Avoid using pre-shredded packaged cheese as it contains cellulose which will affect the dryness and texture of your crackers.
- The consistency of the dough should be soft but not wet or tacky. Your dough should not stick to either your work surface, parchment or hands and should be able to be easily peeled away and handled. Do note that things such as the temperature of your dough, kitchen, the humidity, etc will affect your dough so you may need to add more or less liquid to attain the right texture. However this dough is extremely forgiving to being adjusted. You'll know the texture is right when your dough can be rolled or pressed and the surface is smooth and soft but you can still pick up the pieces without them crumbling or falling apart.
- Using a pizza cutter is the easiest way to cut your thinly rolled dough.
- The thinner your dough, the crispier and crunchier it will be. If it is too thick your crackers will have a softer almost dense/chewy texture (think stale cracker texture) to it. If you go too thin your cracker runs the risk of burning and structurally won't be strong enough to dip or scoop.
- Do note that your crackers will puff up slightly so they will be thicker than what they were rolled out to be.
- Let your crackers cool completely after baking to determine their final hardness. If your crackers don't have the crisp texture and a great snap to them you can place them back onto the tray and bake them for a few more minutes.
